Installing the Snapshot
After selecting the Snapshot Link provided by Narware and agreeing to Upload the Snapshot within your Go High Level Agency account you will need to apply the snapshot to the related Sub-Accounts.
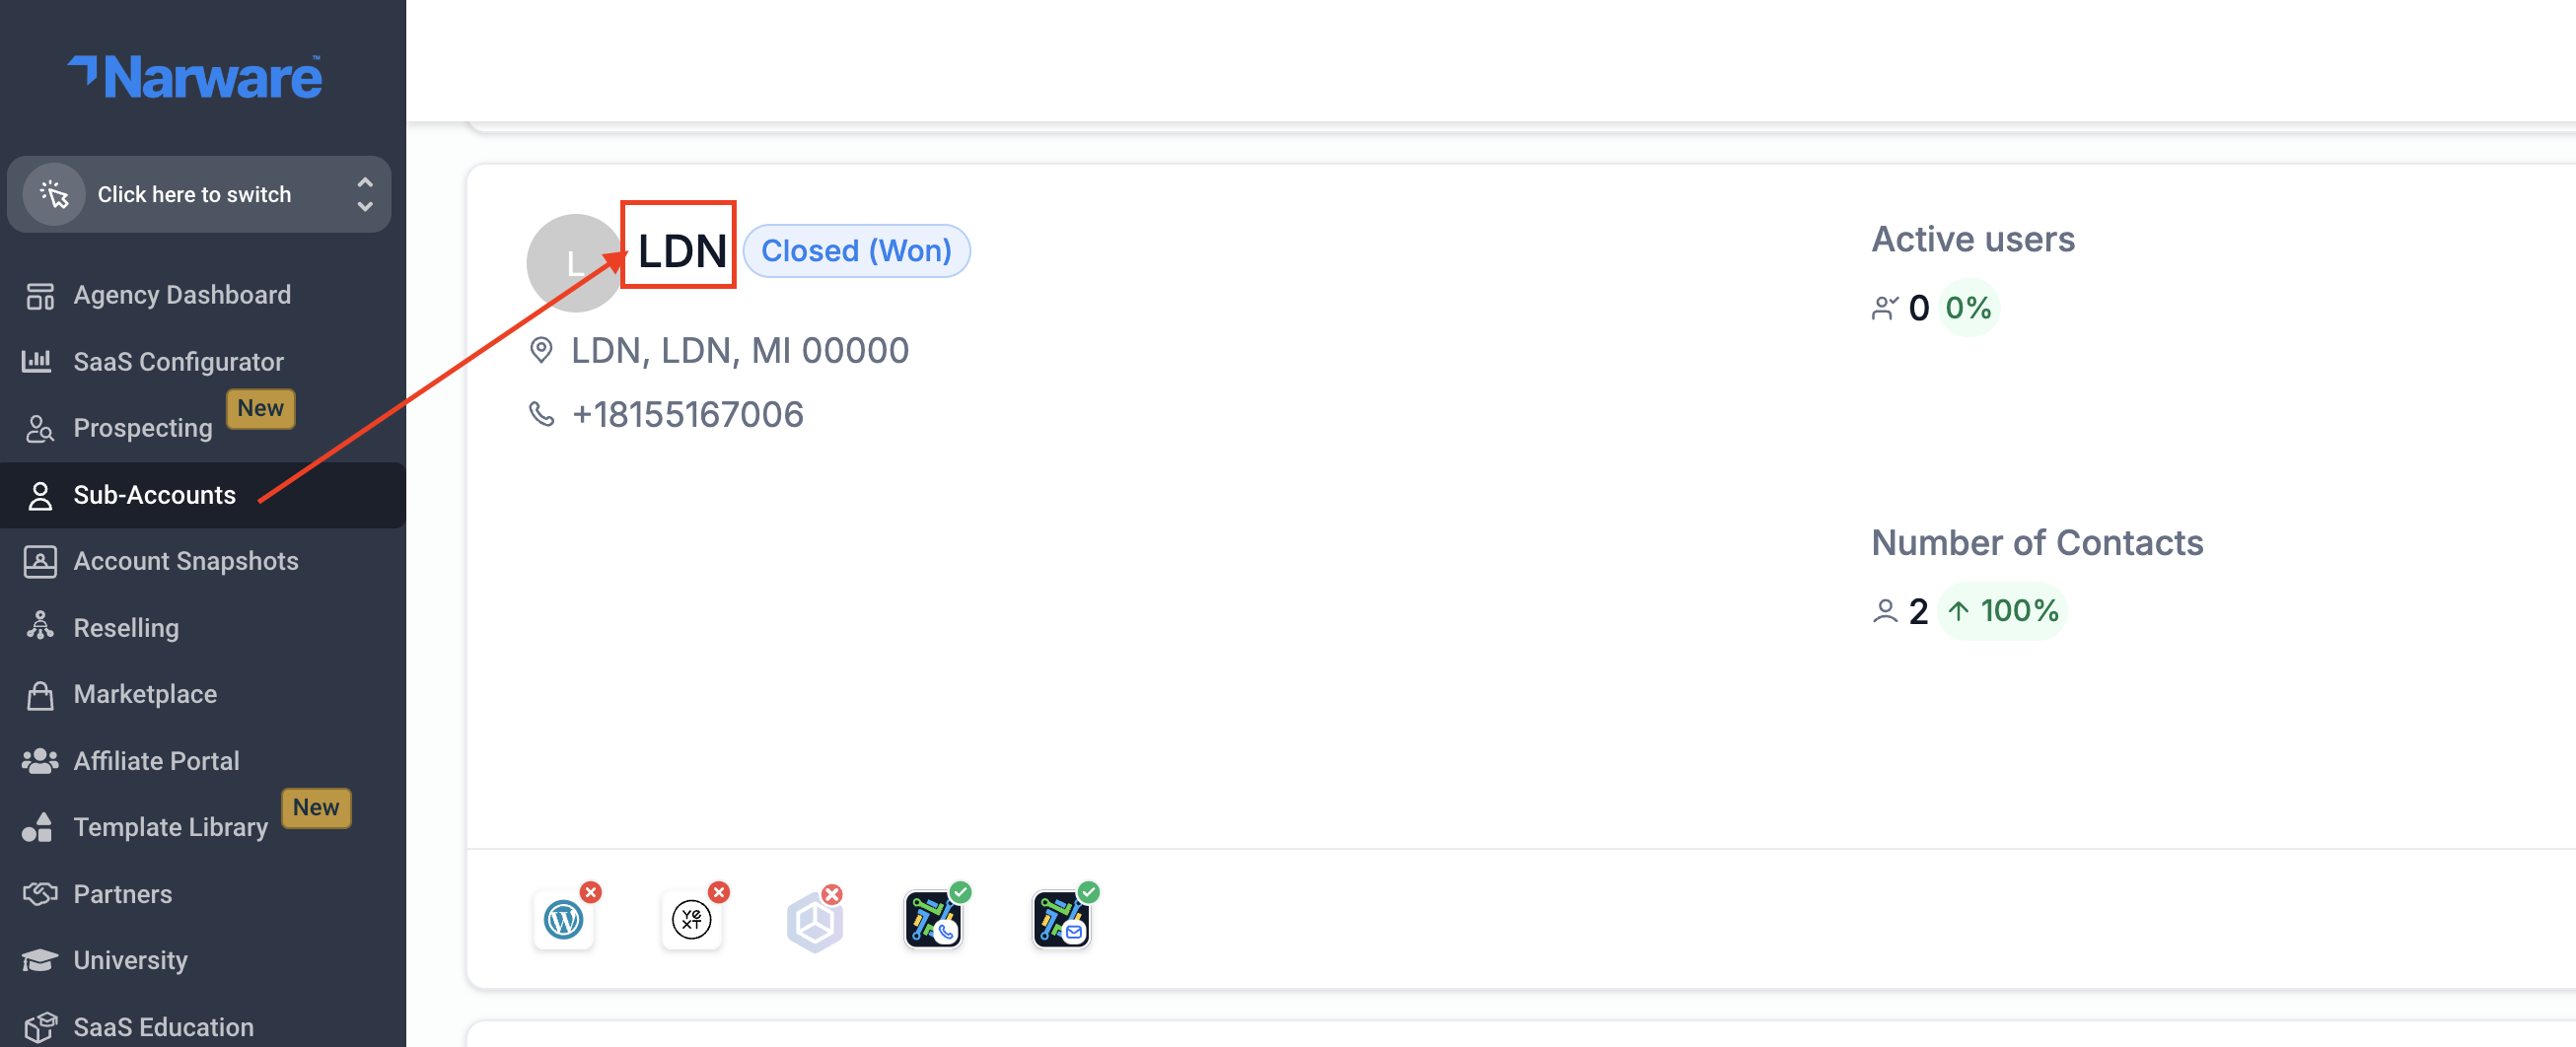
To Apply the Snapshot to a sub-account:
- Select the Sub-Account
- Select the "Actions" button in the top right of the Sub Account and select Load Snapshot.
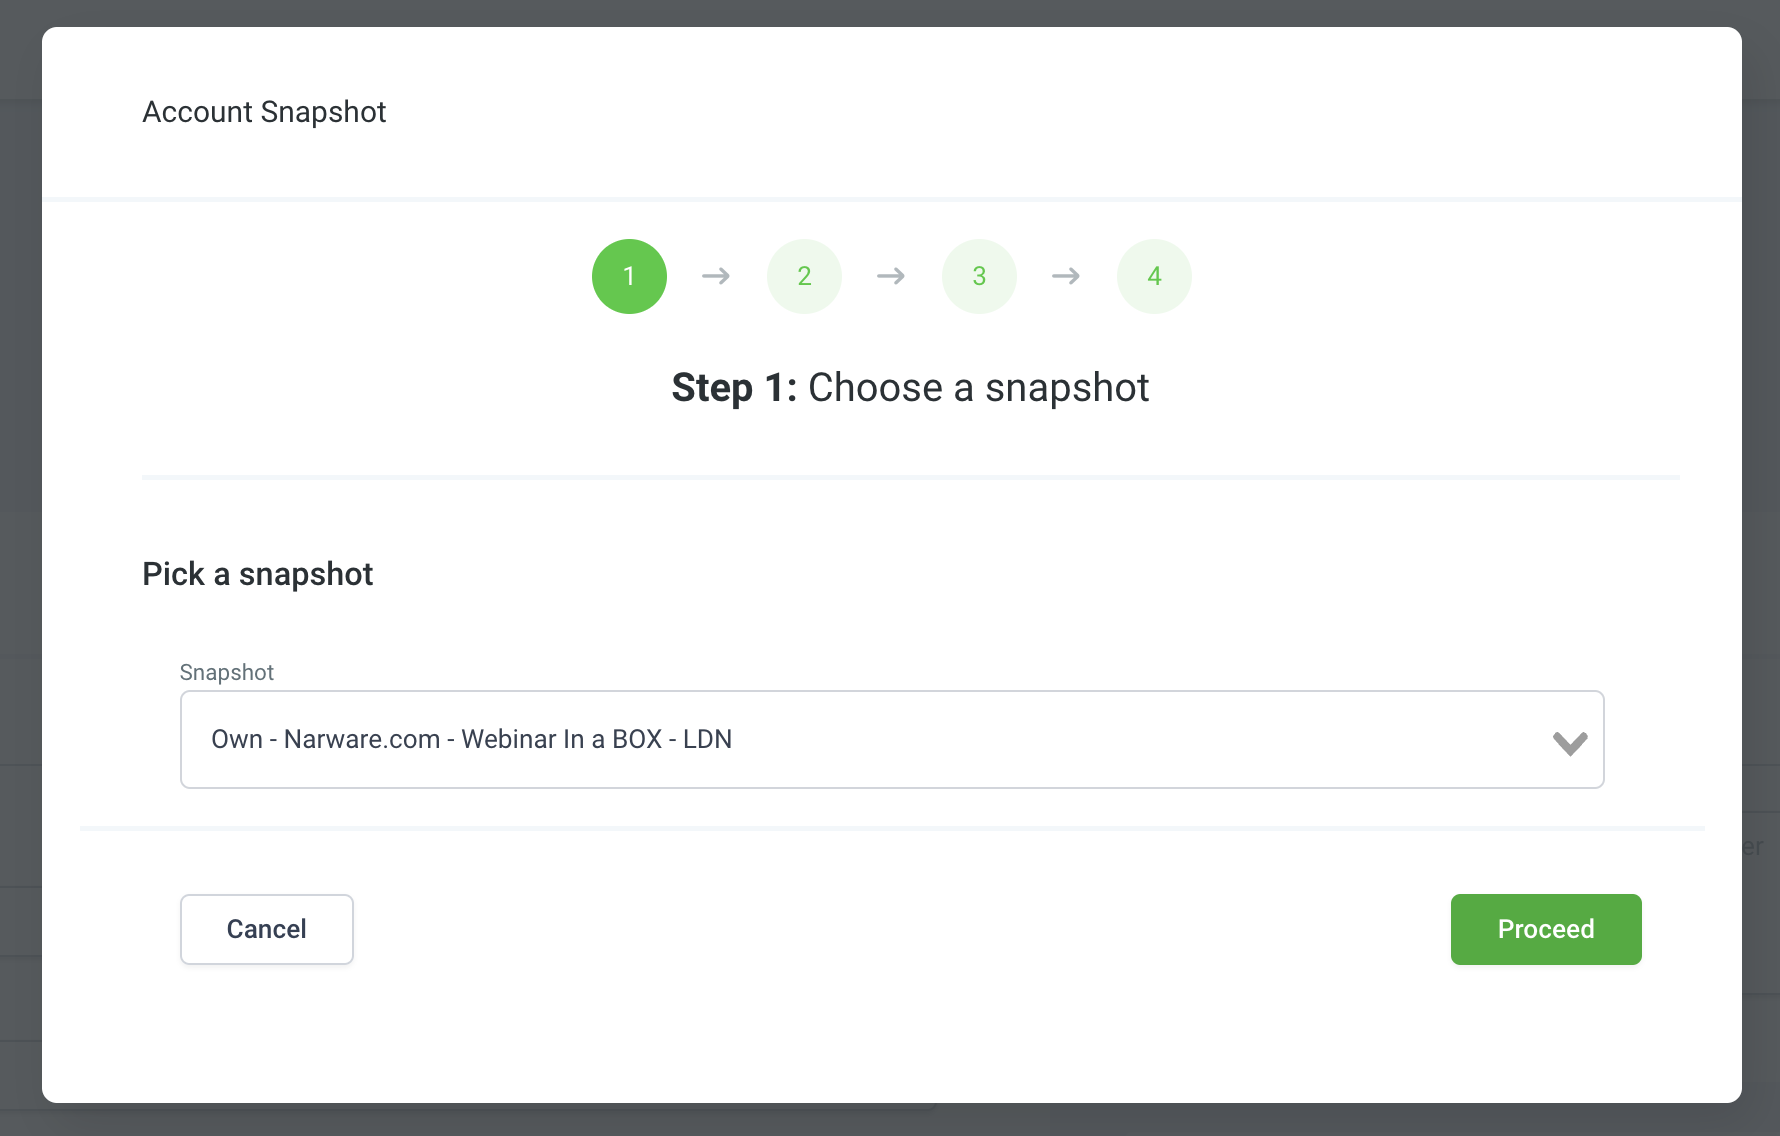
- Select the Webinar In a Box Snapshot by Narware and select Proceed
- Then proceed to "install all" in the next step to complete.

Integrate Go High Level with Narware
- Sign into your app.narware.com account
- Select Integrations in the left navigation of Narware.
- Select the High Level widget at the bottom in the Available Integrations section.
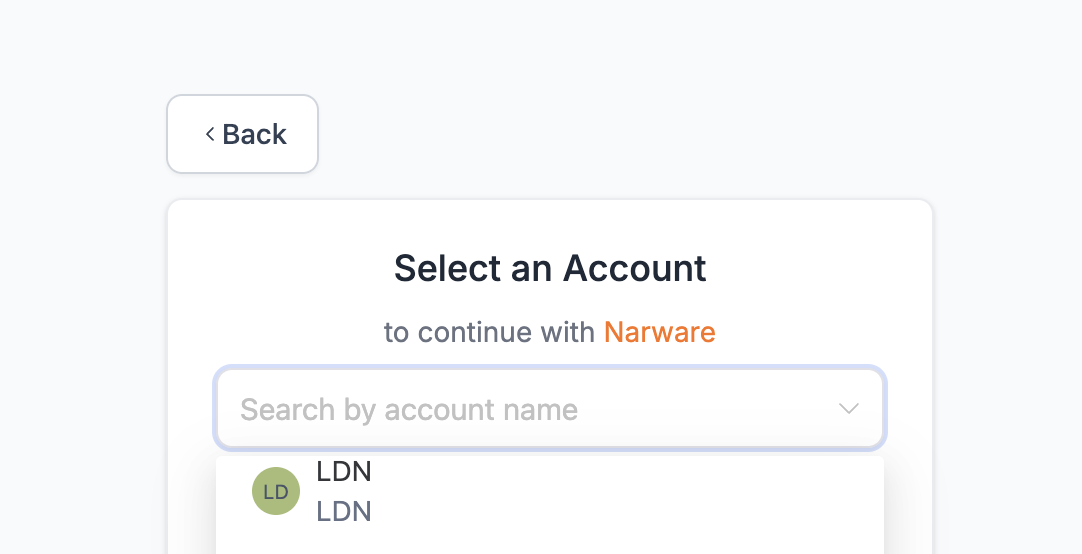
- You will see a prompt to CONNECT HIGHLEVEL, select "Continue with GoHighLevel"
- Select from your Sub-Accounts the account you installed the snapshot on.

The proceeding sections we will identify the features and functions included with the snapshot along with the basics on how to use them.
Tags
Tagging is a very common practice in flagging a contact who has interacted with your services in a particular way such as reading an email, clicking a link or registering for or attending an event. With Narware we have identified specific tags and built campaigns within Narware that will add and remove tags to a contact upon engagement. We have included in the Snap Shot a set of 11 tags that we have built automation around. These tags are listed below and are already integrated into the Workflows of GHL and the Campaigns of Narware to support our proven practice of tagging for Webinars.
-
attendee - added when a contact attends a webinar - this tag will trigger the Webinar Attended campaign
-
clicked calendar link - this tag is added when a contact interact with a calendar link provided in the emails.
-
client - Contacts who have purchased exceeds ($10) or more will be automatically tagged client
-
hot opportunity - Contacts who engage in a webinar by posting the (buzz) word in a Webinar, posting their phone number in the QA Chat of the webinar or simply attending for greater than (50) minutes will all be flagged with the hot opportunity tag which will fire off the Hot Opportunity campaign.
-
left early - if Contacts leave early from the webinar Narware will then assign this tag to the contact which will fire off the Left Early campaign to communicate to the person what they missed.
-
missed webinar - Contacts who register for a webinar but fail to actually attend the webinar will be assigned this tag. The missed webinar tag will fire of the associated campaign with the intention to try and get them into the next available webinar.
-
new contact - designed to identify contacts who are new.
-
registered - this tag will be added to each contact upon registration to a webinar. This by design will result in the campaign Registration Confirmation & Reminders
-
watched webinar replay - the watched webinar replay tag is assigned to a contact when they click on the webinar replay trigger link within an email.
-
webinar booked call - when a contact selects the trigger link to book a call will result in a contact getting this tag assigned and will end the campaign they are currently on.
-
webinar invite - when a contact is assigned this tag through automation or manual add, the Narware Registration Webhook will be fired off to register the contact for the Next Available webinar related to the defined Webhook Link.
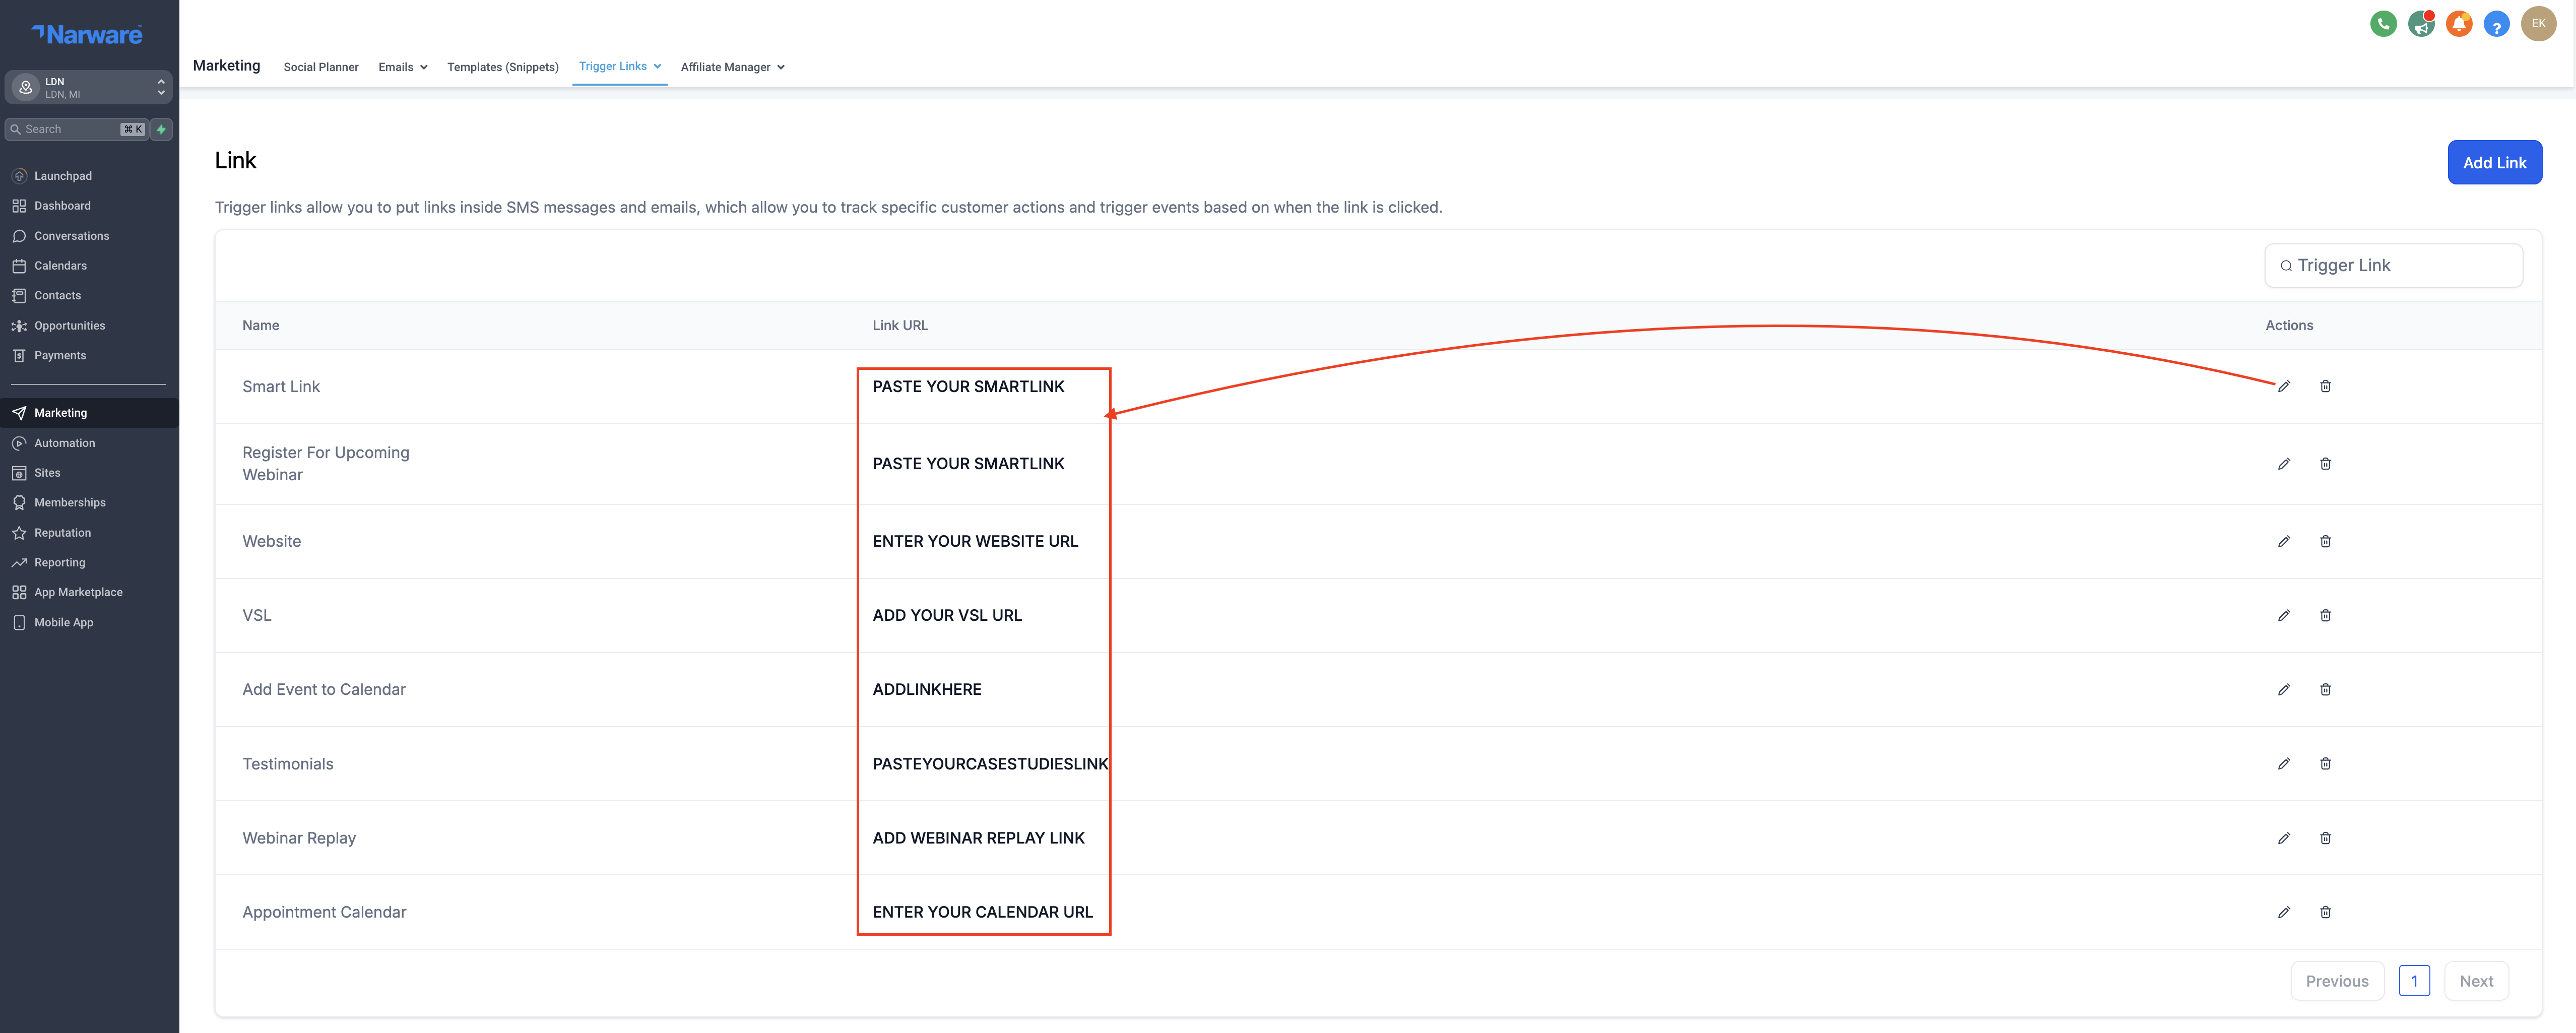
Configure Trigger Links (8)
A trigger is designed to execute conditional statements. Narware has configured eight different Trigger links that will require you to provide the information referenced in the (). These trigger links appear in the forms, sites, email and sms campaigns and like Custom Values when updated will update all places where that trigger link exist. Allowing you to avoid having to update each of your pages. The use of trigger links along with Custom values provides a great deal of efficiency for updating your content.
-
Smart Link (Enter Smart Link)
-
Register for upcoming webinar (Enter Smart Link)
-
Website (Enter Your Website URL)
-
VSL (Add your VSL Url)
-
Add Event to Calendar (Provide Link to Event Calendar)
-
Testimonials (Paste Case Studies Link)
-
Webinar Replay (Link to Webinar Replay)
-
Appointment Calendar (Provide Link to your Appointment Calendar)
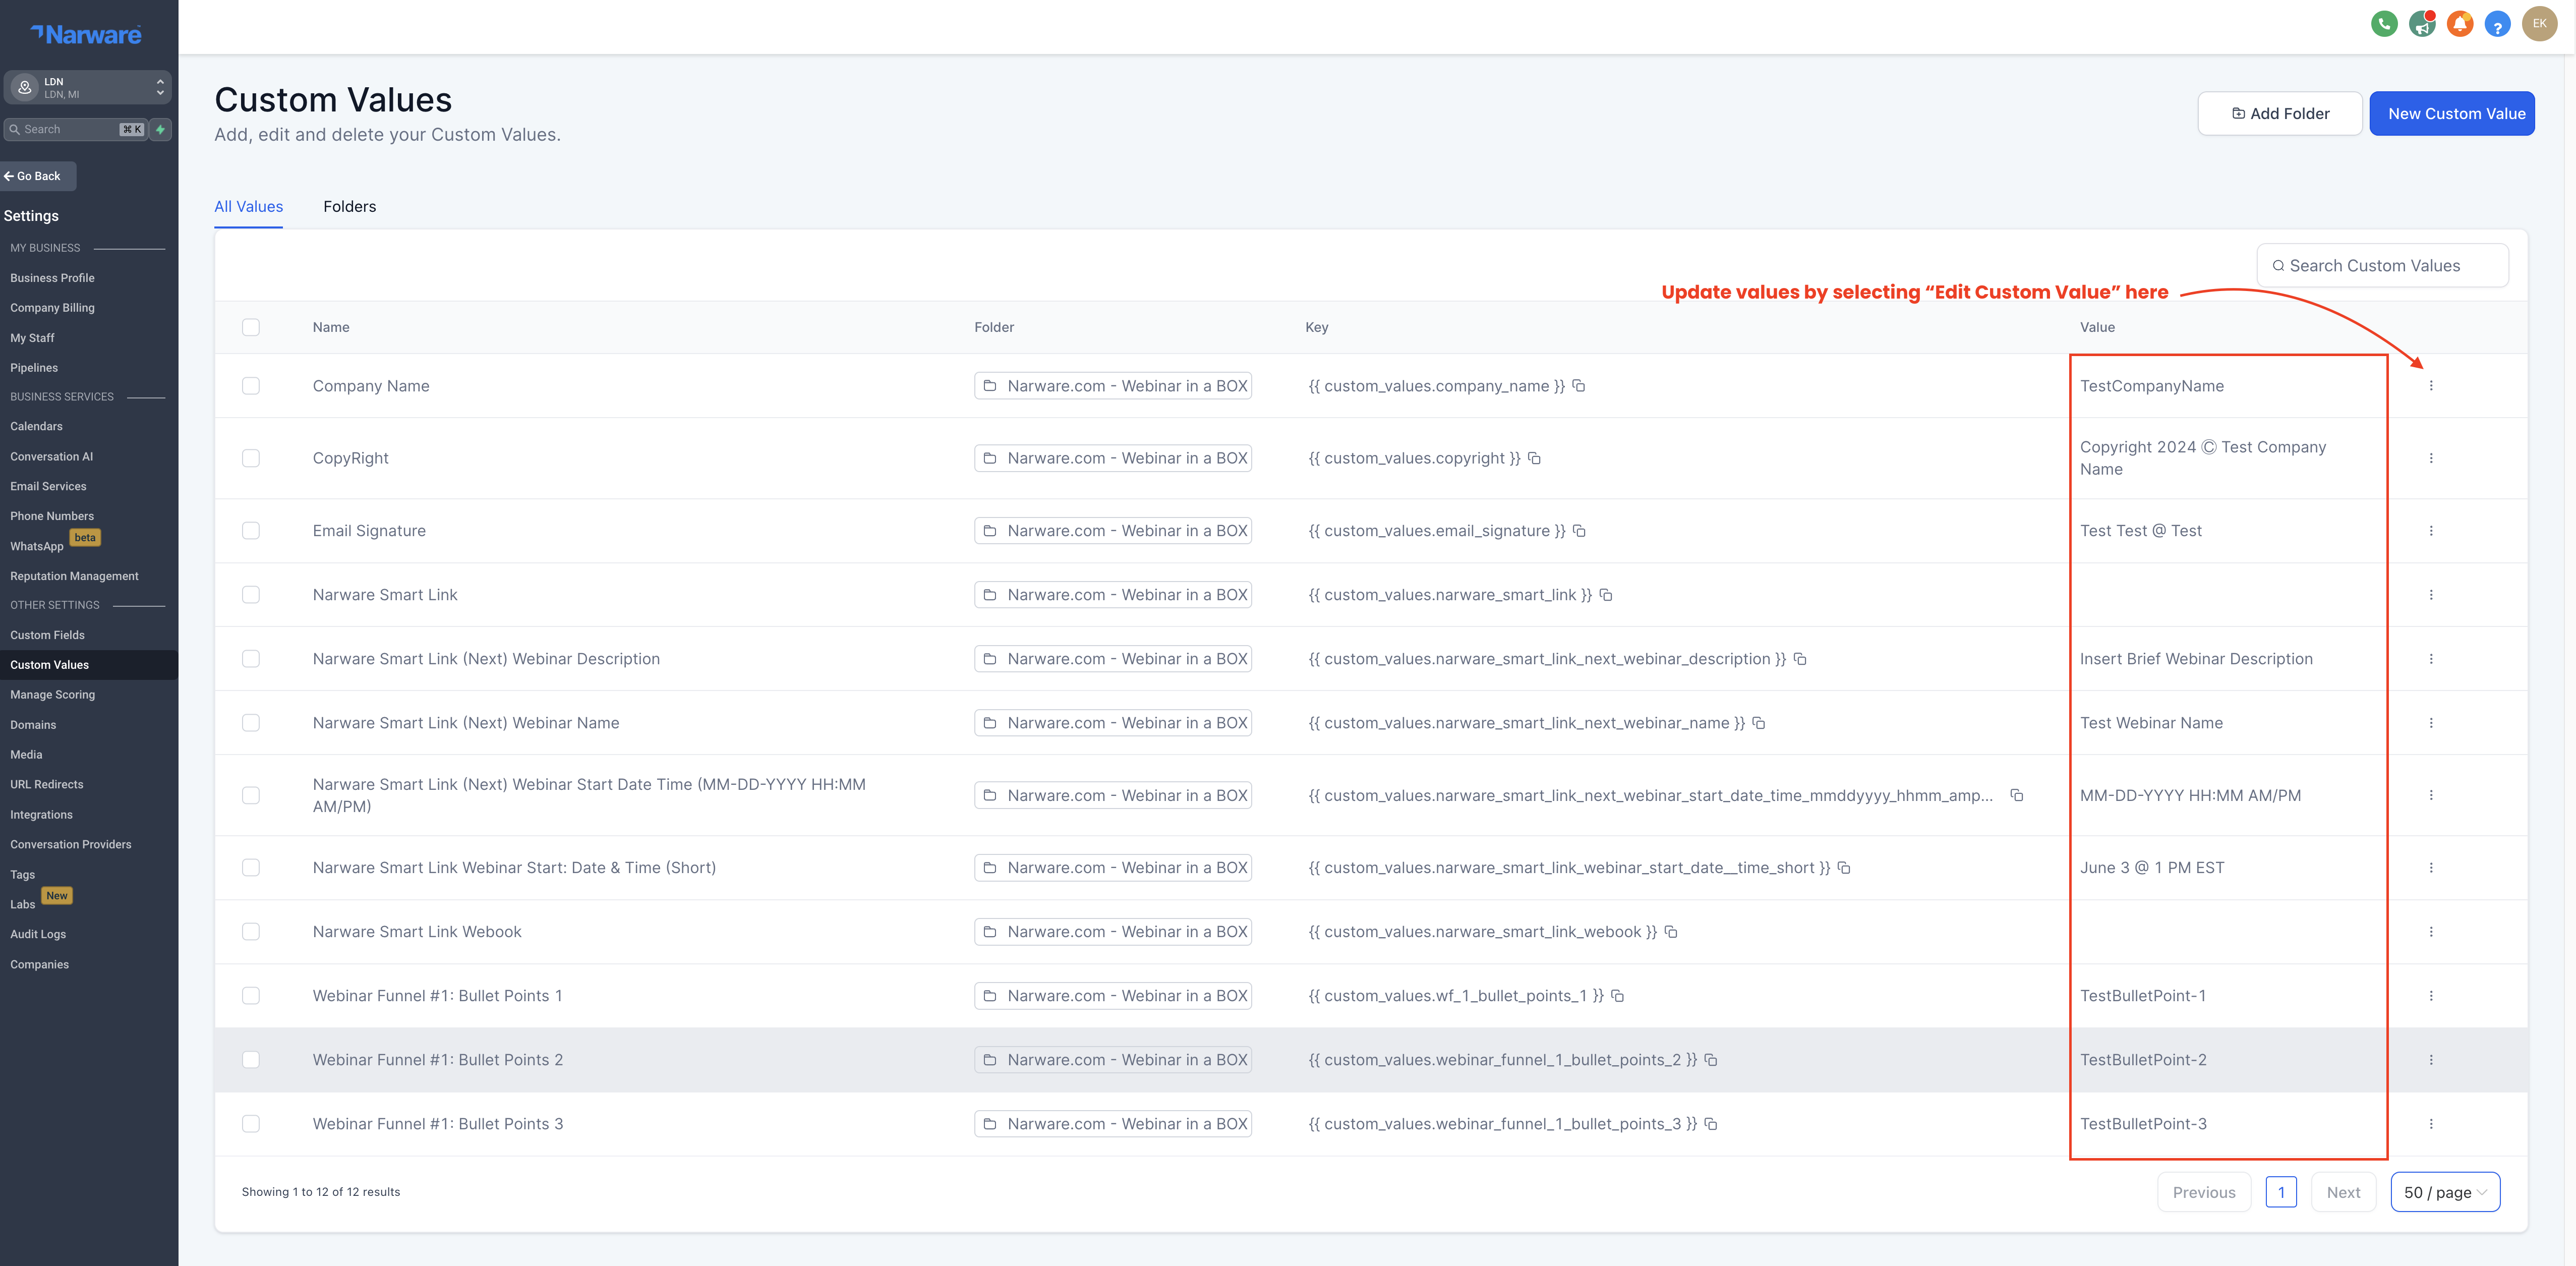
Configure Custom Values to reflect Company (12)
Custom Values allow you to insert information that when changed will apply across all things such as Emails, Sites, SMS messages that contain that custom Key Value for example: {{ custom_values_company_name }}
The Custom Values that are Include are:
-
Company Name
-
Copyright
-
Email Signature
-
* Narware Smart Link
-
* Narware Smart Link Webinar Start Date/Time (Short) – June 3 @ 1PM EST
-
* Narware Smart Link (Next) Webinar Name
-
* Narware Smart Link (Next) Webinar Description
-
* Narware Smart Link (Next) Webinar Start Date/Time
-
* Narware Smart Link Webhook
-
Webinar Funnel # 1 : Bullet Point 1
-
Webinar Funnel # 1 : Bullet Point 2
-
Webinar Funnel # 1 : Bullet Point 3
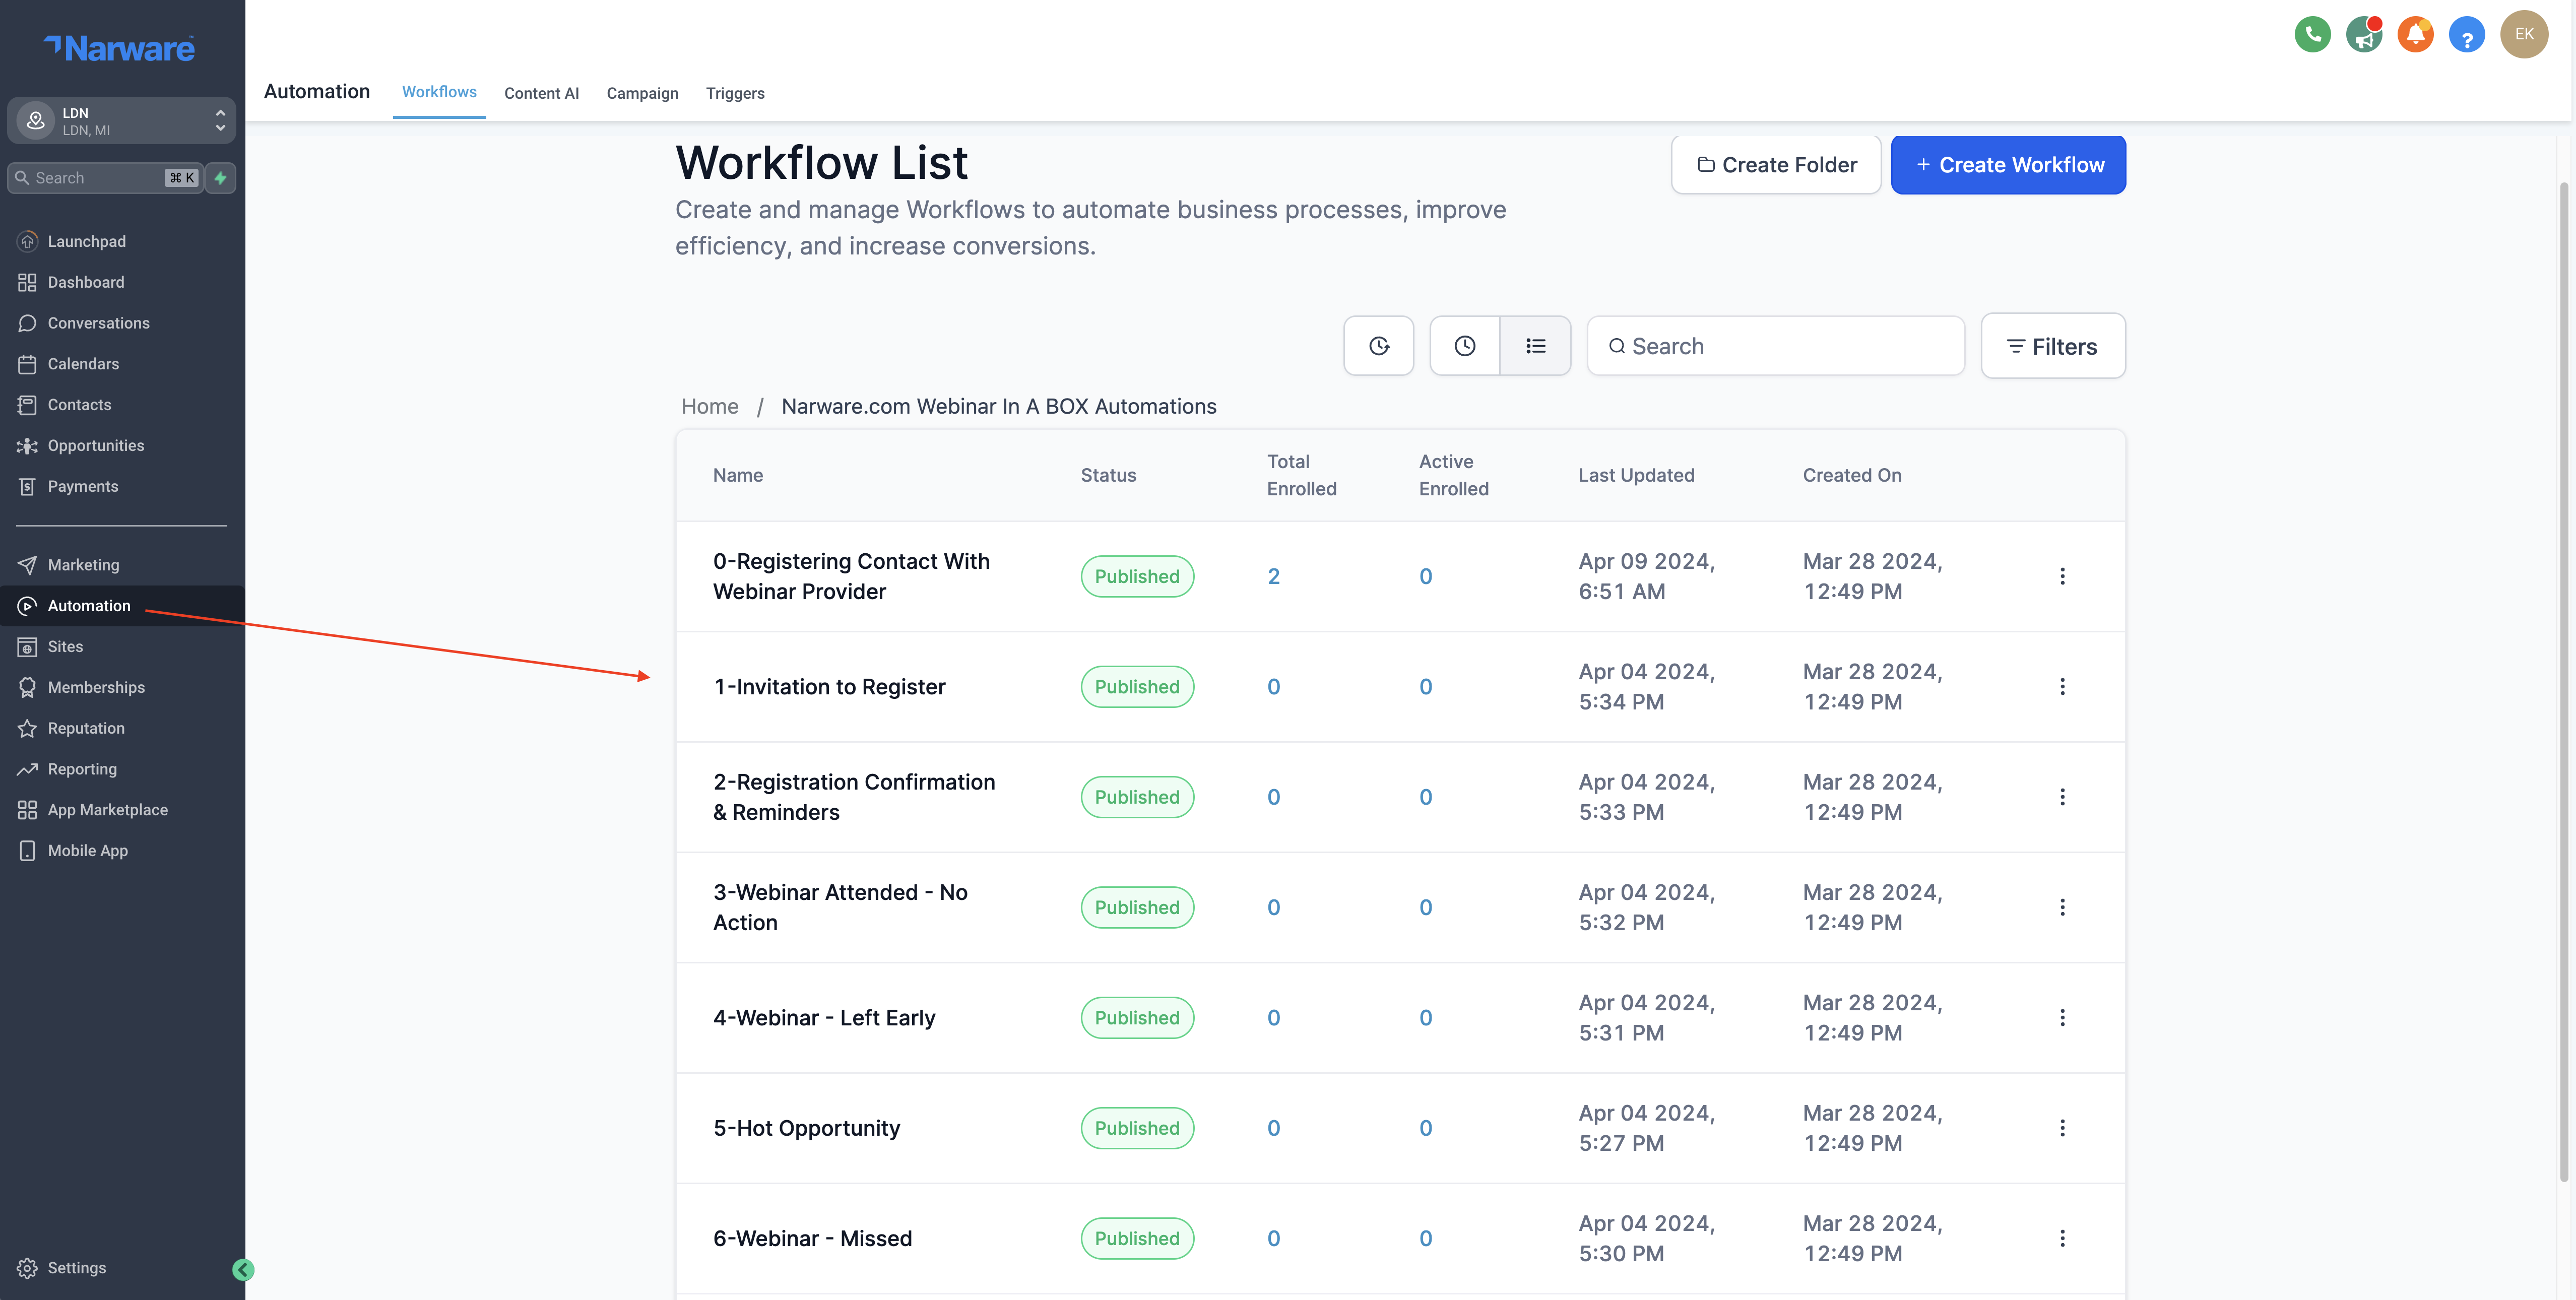
Understand/Configure Automations
Automations are an important feature within Go High Level. The Automation section is where a User can design workflows that automate actions. A simple example of this can be when a customer gets a tag send them a series of emails the first being right when they get the tag and then spread the rest out over the next 5 days. Narware has designed 7 workflows focused on getting your contacts to engage and remind contacts based on their interaction with your webinar services and emails. These seven campaigns we have designed to support a proven and effective campaign strategy with almost no effort.
-
0 - Register Contact with Webinar Provider (Form Submitted or Tag Added - webinar invite)
-
1 - Invitation to Register (Tag Added - webinar invite)
-
2 - Registration Confirmation and Reminder (Tag Added - registered)
-
3 - Webinar Attended - No Action (Tag Added - attendee )
-
4 - Webinar - Left Early (Tag Added - left early )
-
5 - Hot Opportunity (Tag Added - hot opportunity )
-
6 - Missed Webinar (Tag Added - missed webinar )
Sites
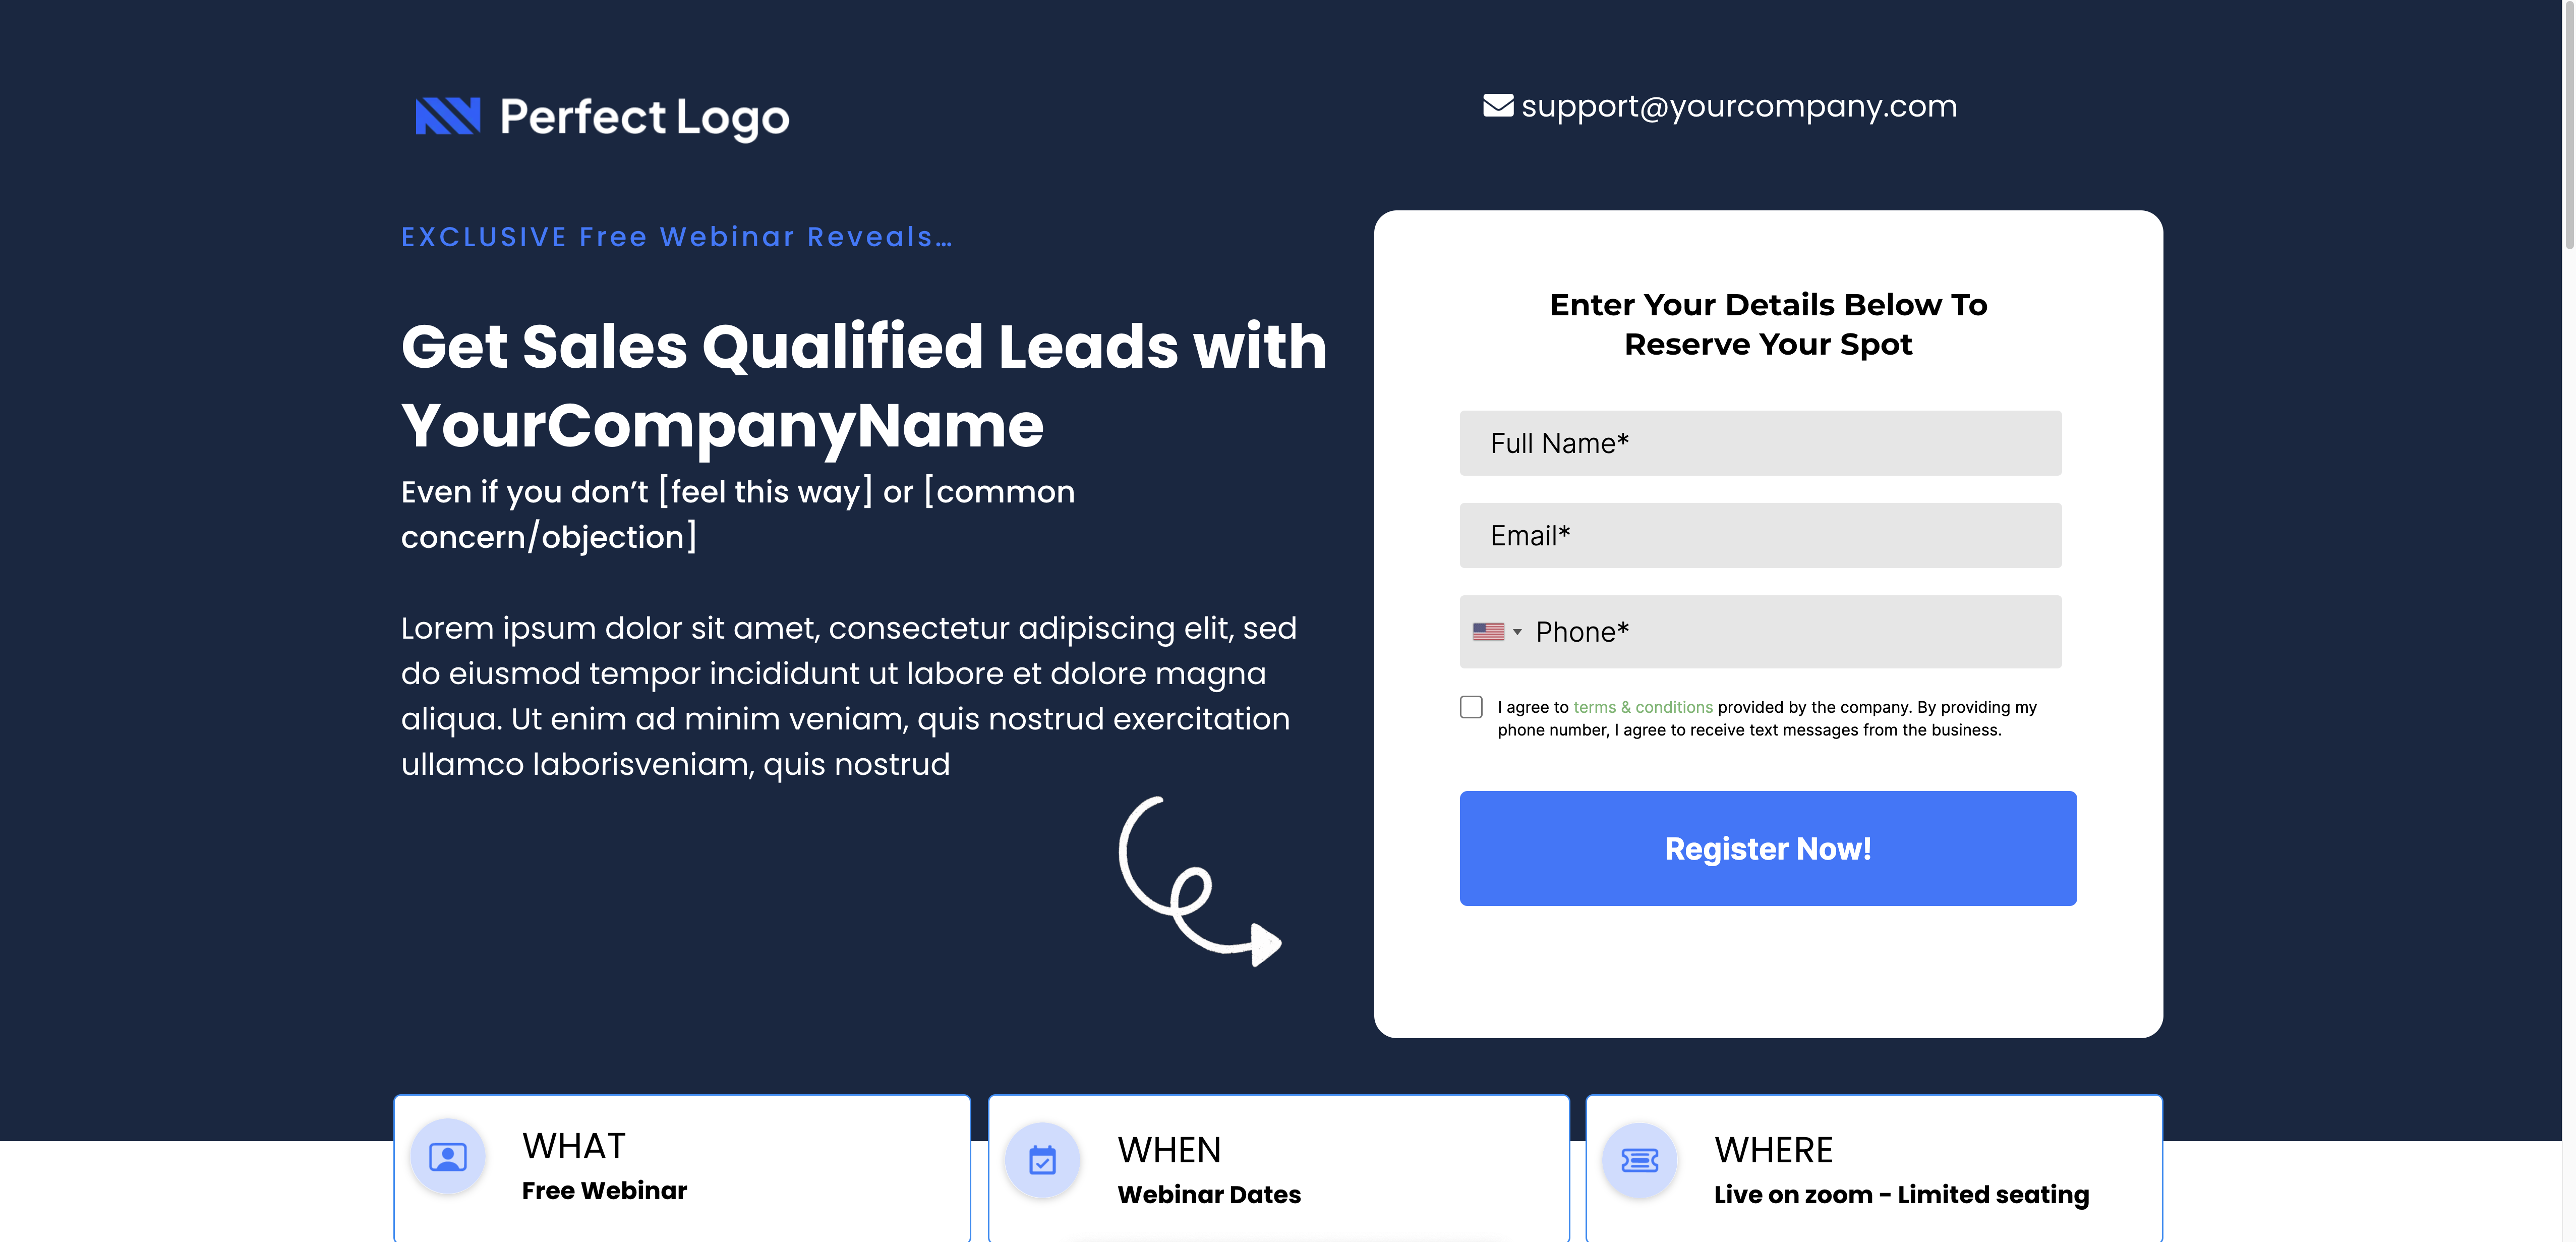
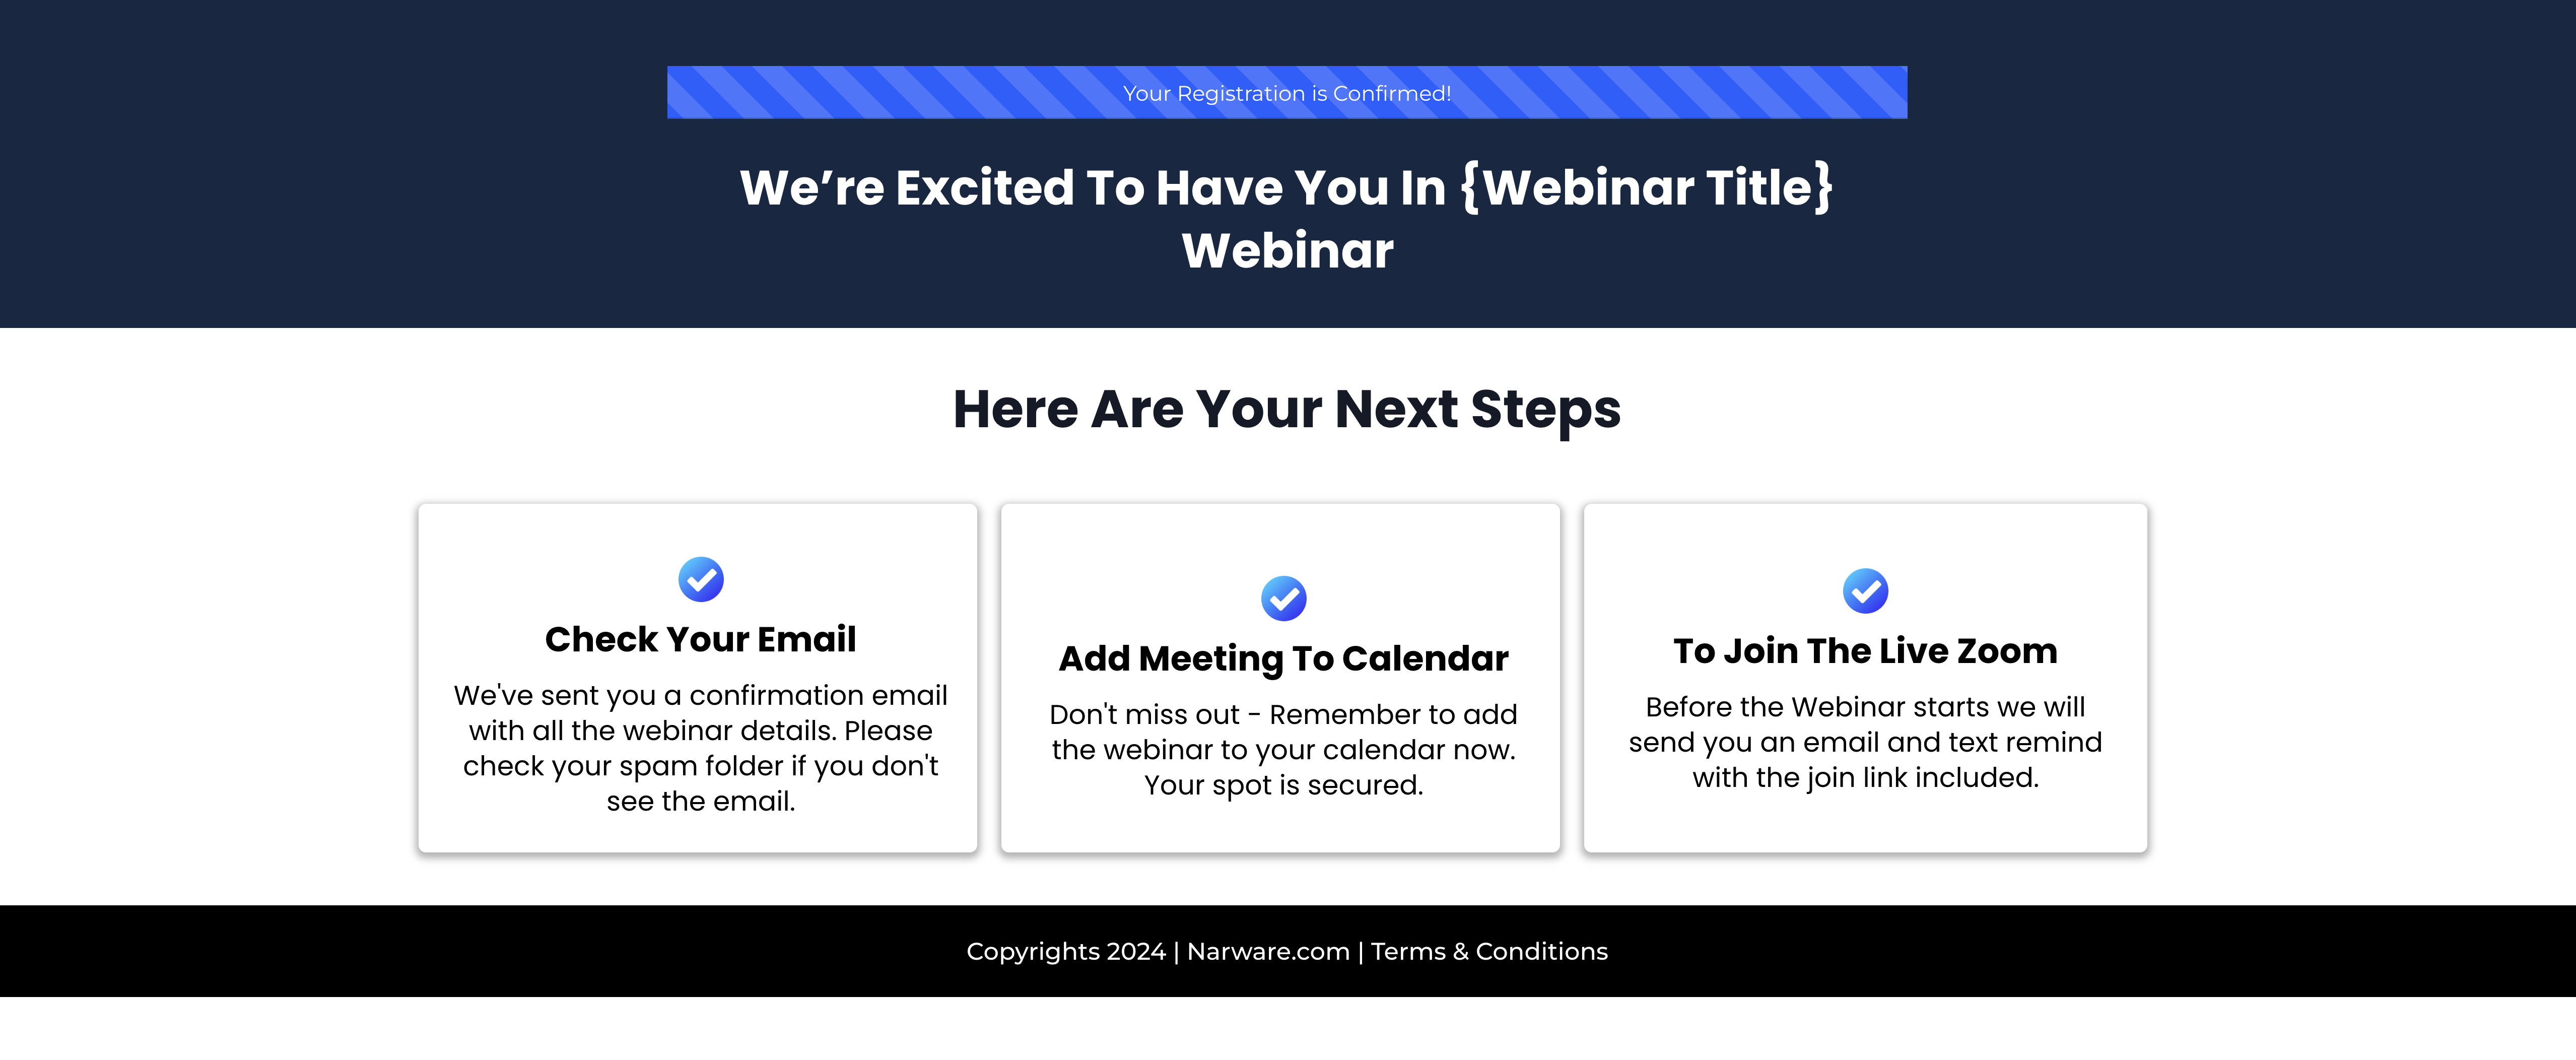
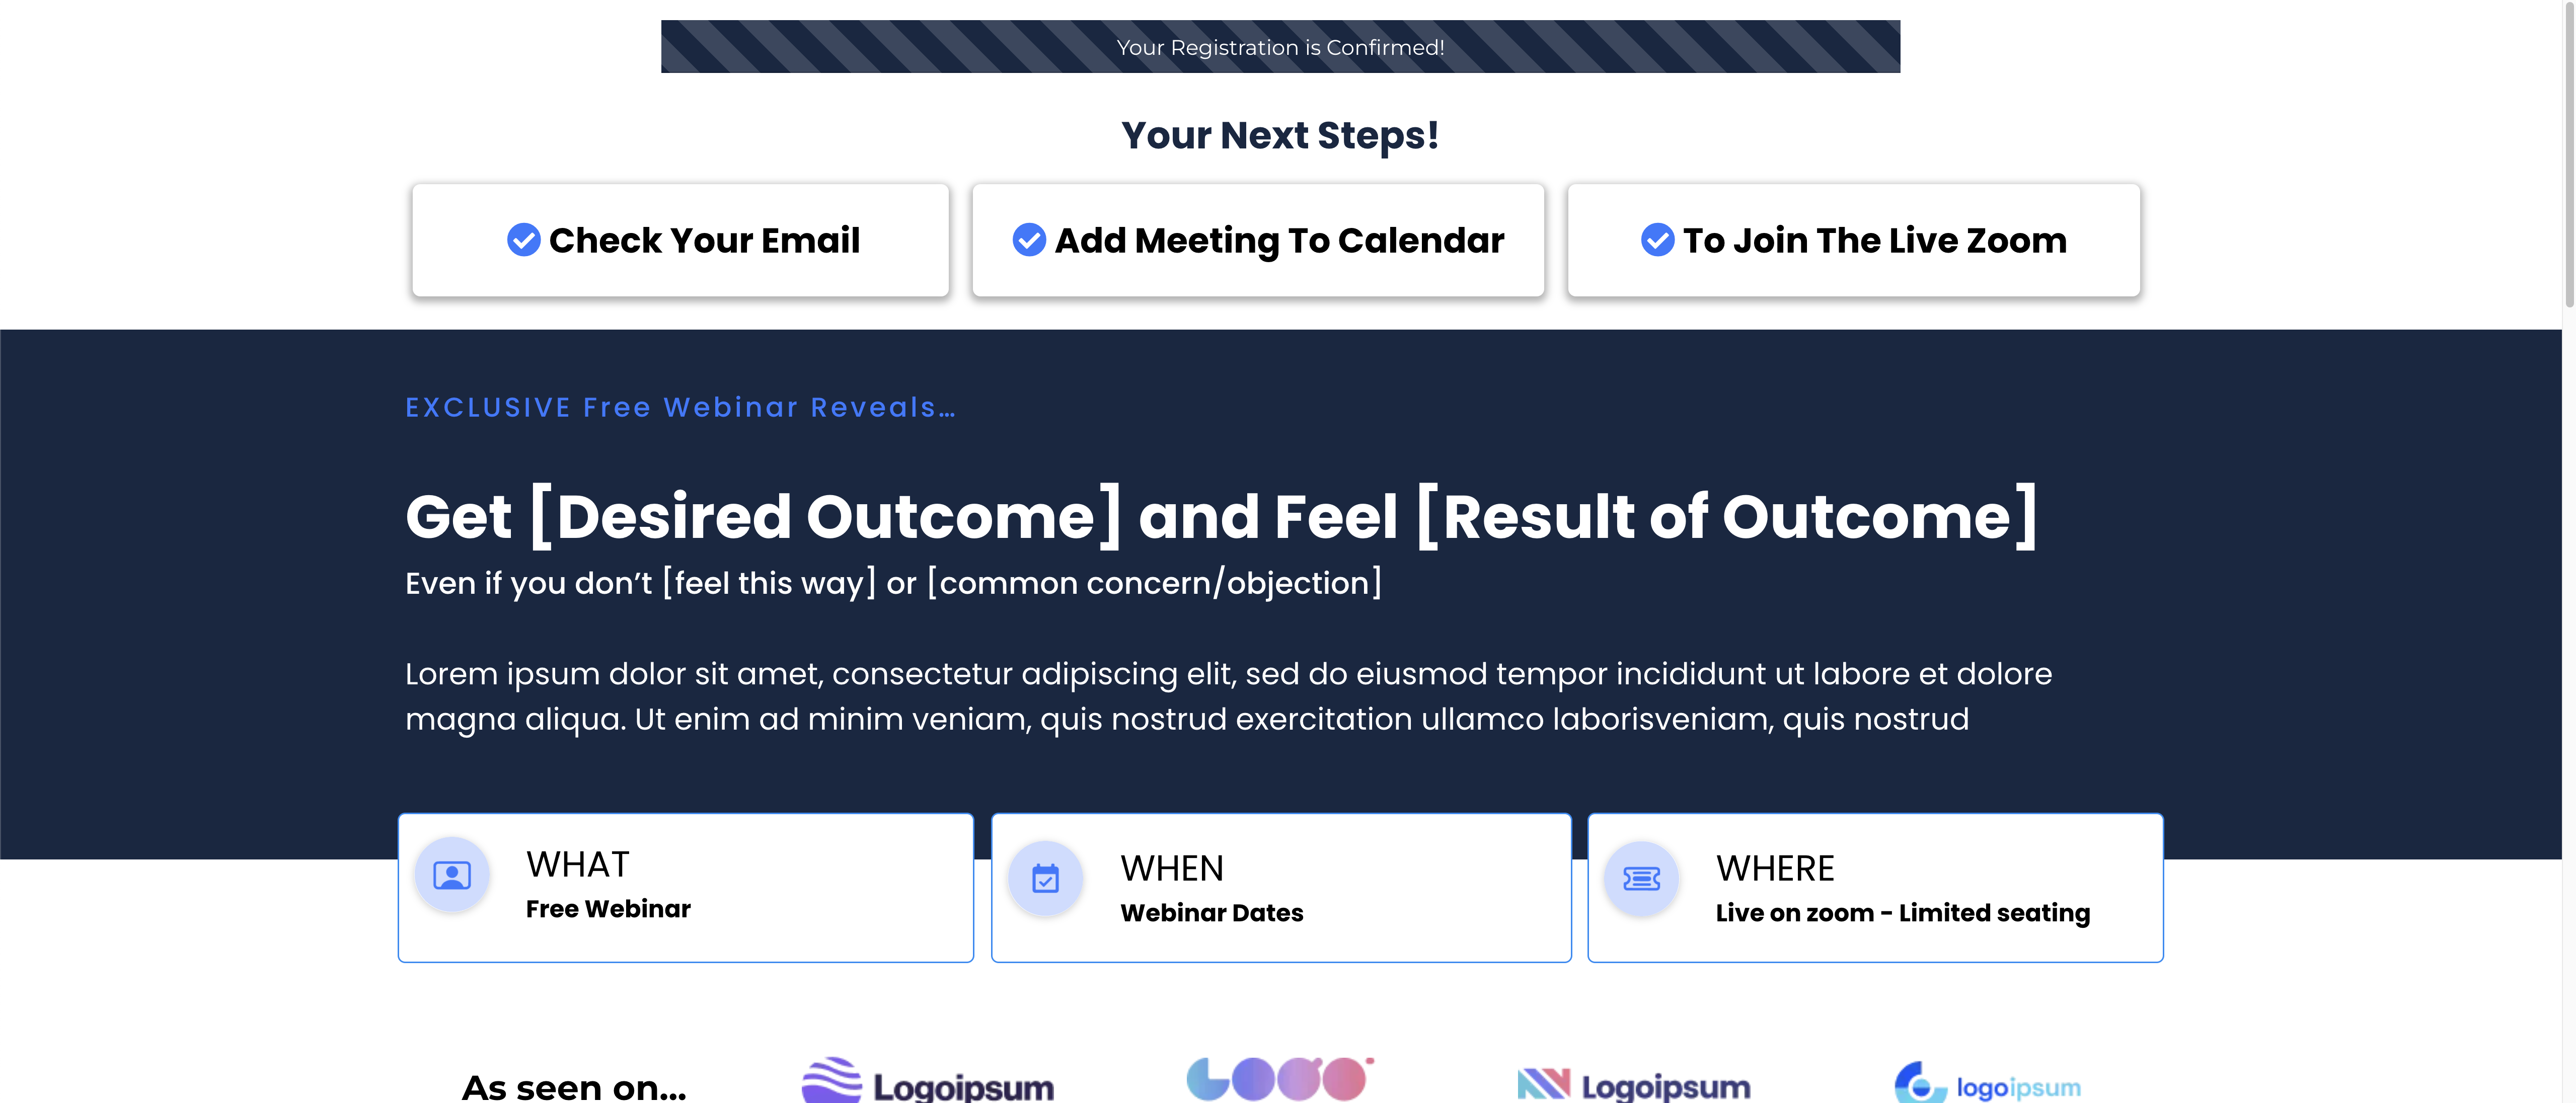
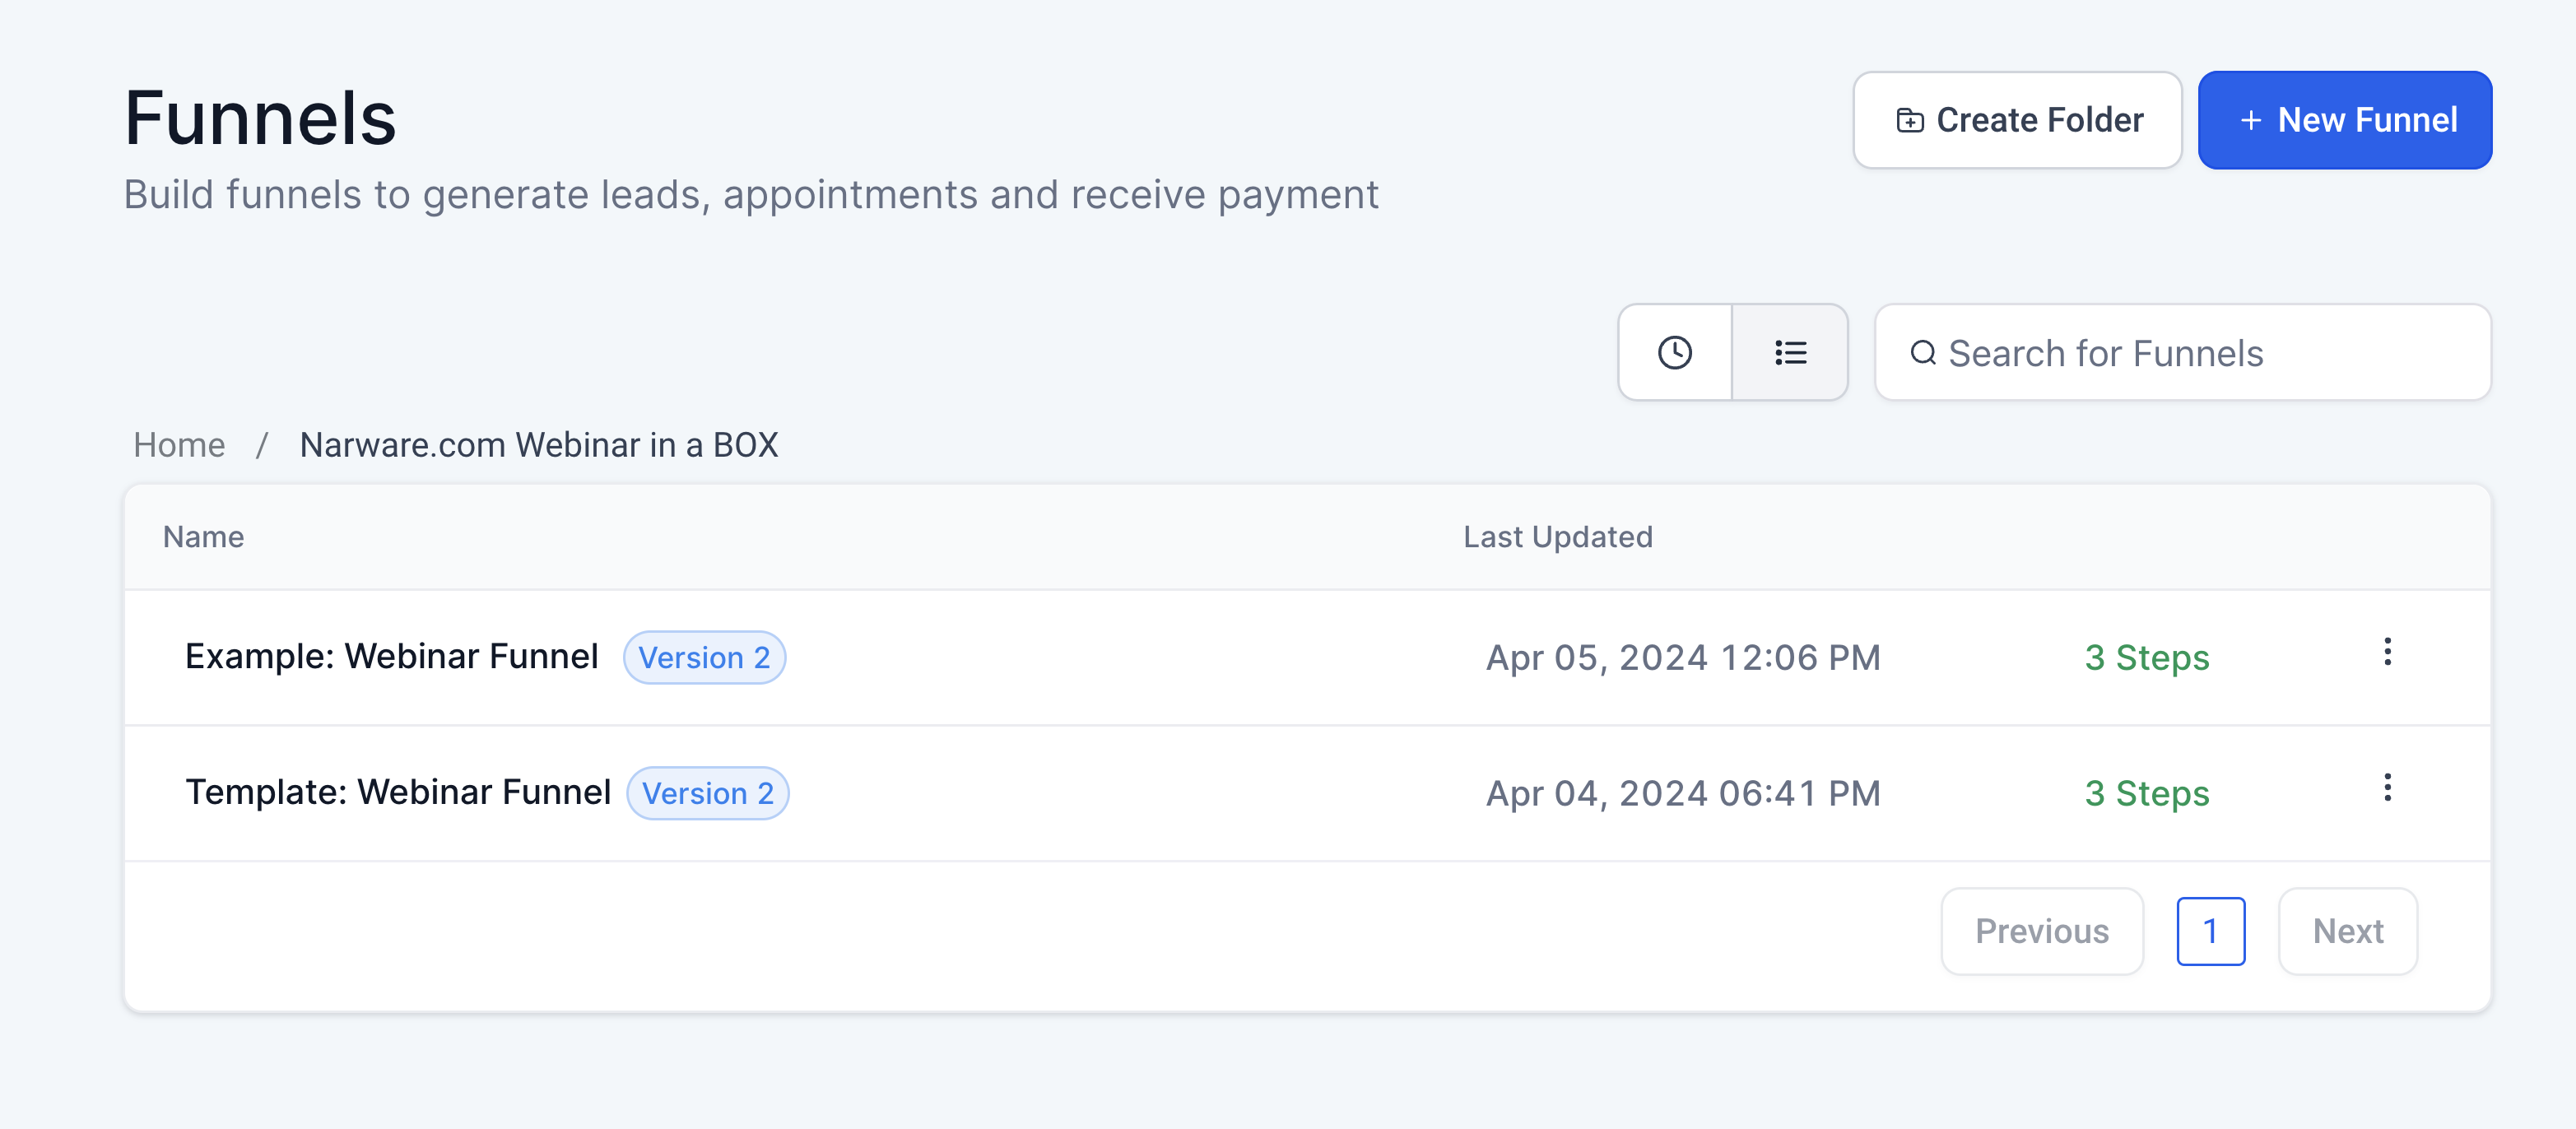
Narware has created some important funnel pages related to webinars that you will be able to utilize within your smart links and drive the appropriate webinar experience. The pages will need to be published to your defined domain and will also need to be updated to support your companies message. Narware has provide a template funnel designed for you to edit and provide custom messaging. We also provided an example funnel where the pages are set up with messaging we have designed.
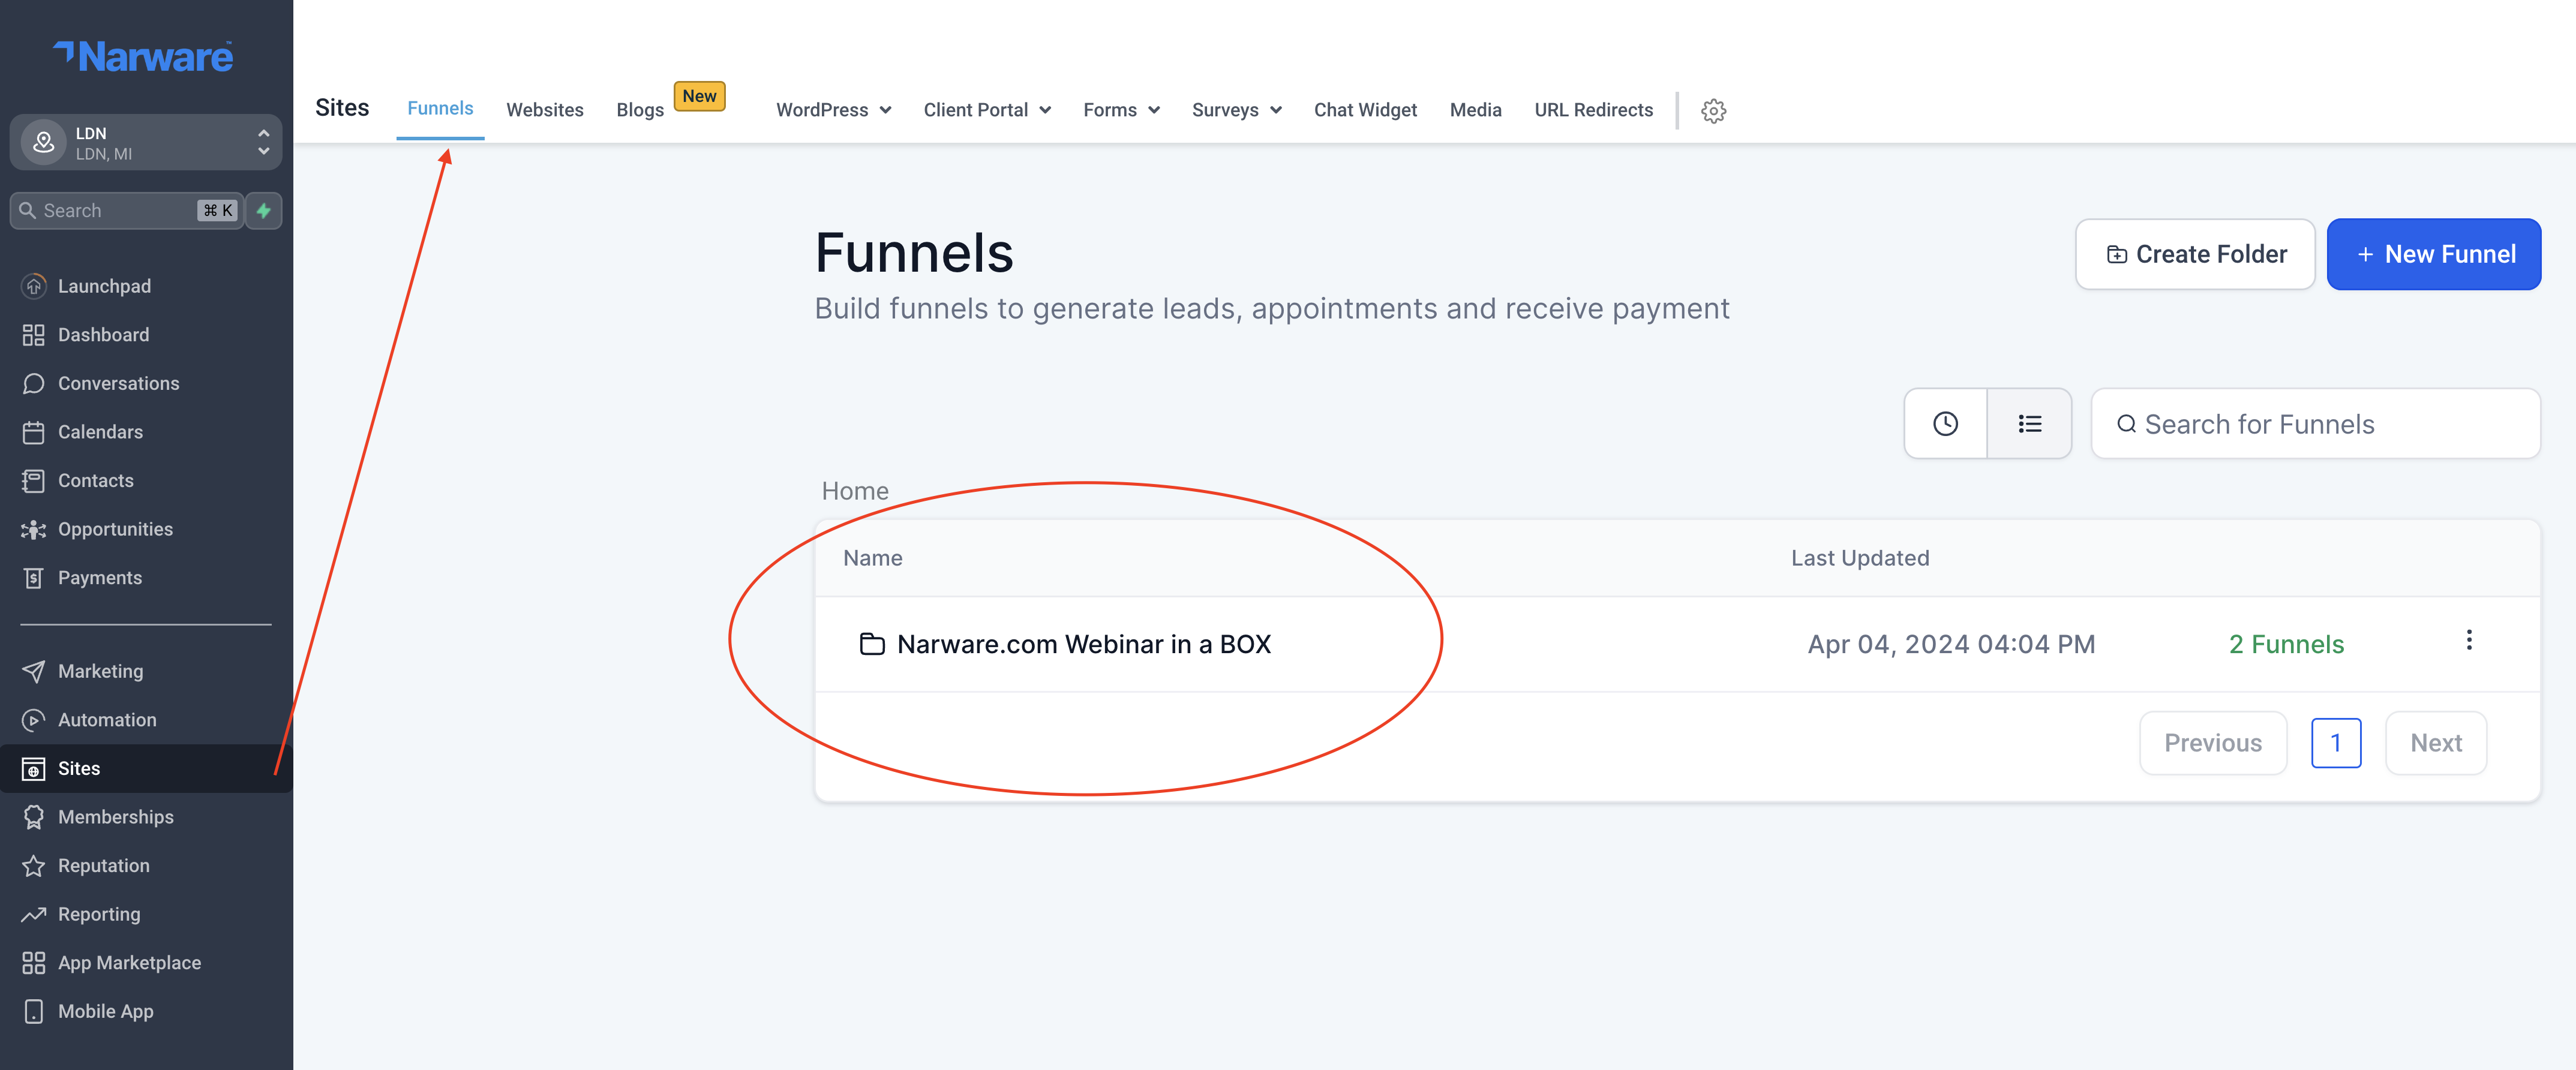
To Access the funnels :
- select "Sites in the left navigation and you should be in the Funnel section.
- select the "narware.com Webinar in a Box" folder
- there you will see the two funnels, a template folder and a example funnel both containing 3 pages.


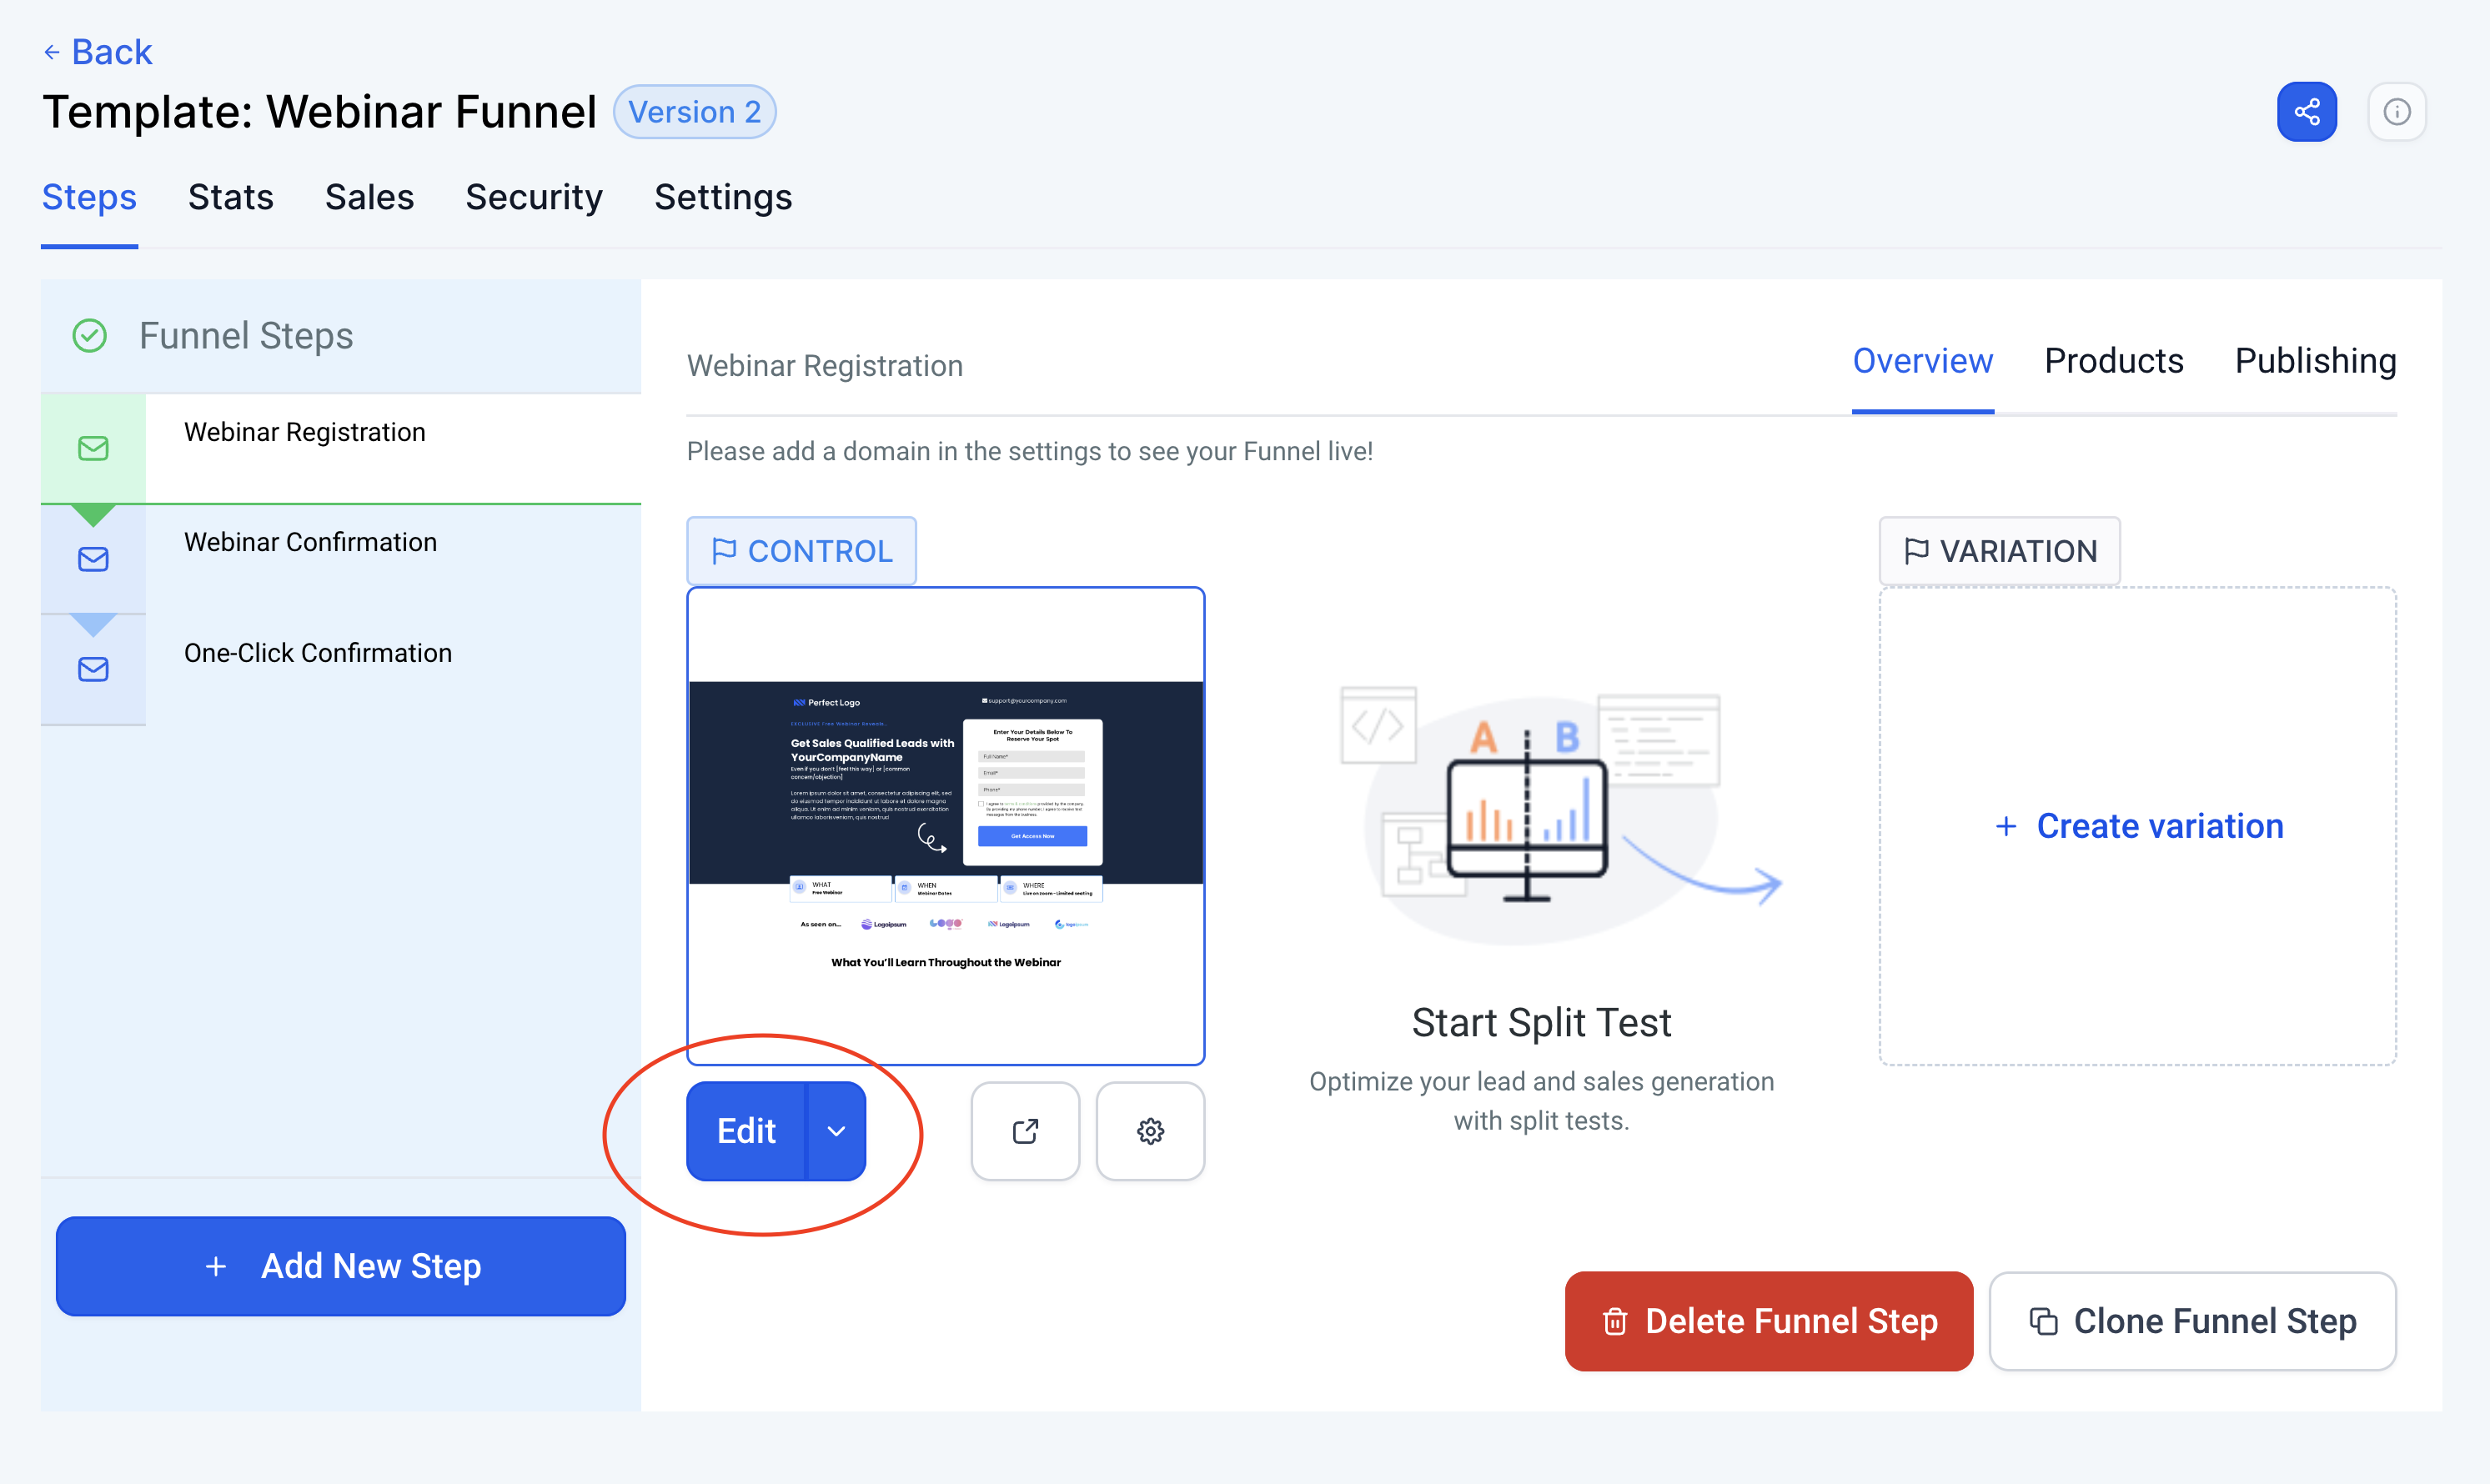
The Three funnel pages are:
-
Webinar Registration
-
Webinar Confirmation
-
One-Click Confirmation
Setting Up Webhook
A Webhook can be one of your most value automation tools. The webhook is designed to simply register your contacts in the background due to some sort of condition being met. Examples could be like adding a tag "webinar invite" which is how we currently have the Webinar in a Box Configured. However, you are able to be creative with the Narware Webhook and use it where you find most appropriate.
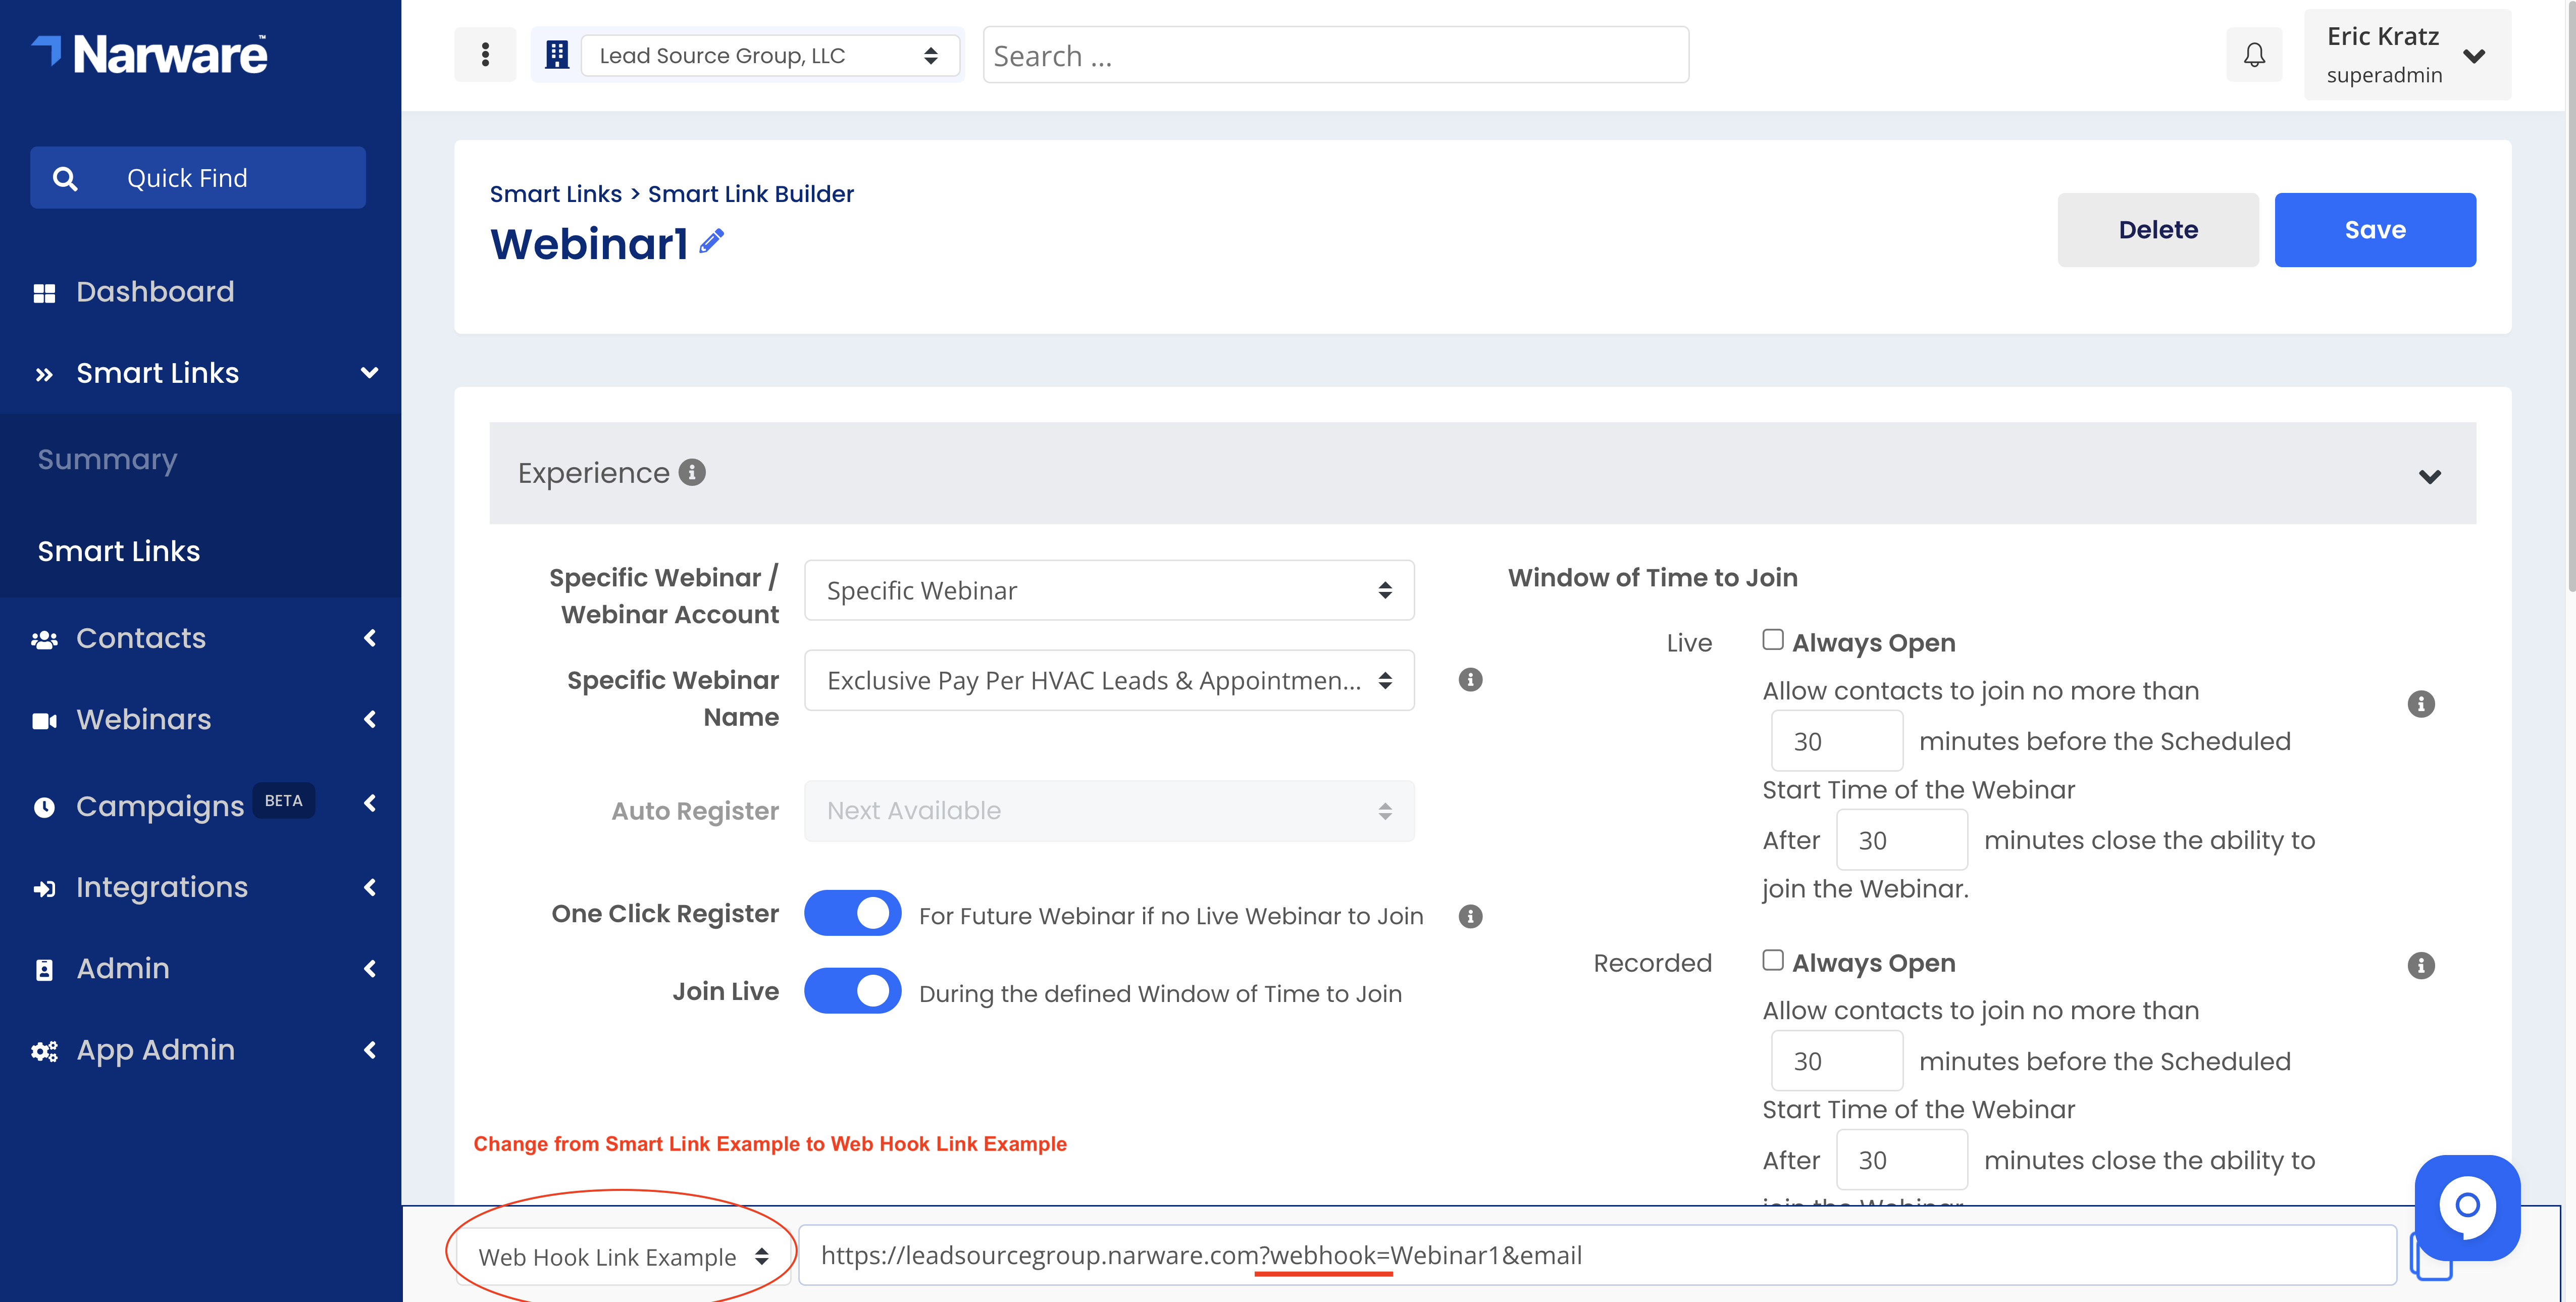
How to set your Webhook link from Narware into Go High Level
- Select your Smart Link created with all the desired webinar settings.
- Select in the bottom left of the page the drop down option that says Smart Link Example and change it to Web Hook Link Example
- Copy the URL then paste it in your Webhook set inside campaign ( 0 - Registering Contact With Webinar Provider ) within Go High Level.